Creating a Virtual Firewall
To create a Virtual Firewall, follow these steps:
- Navigate to the Networking > Virtual Firewalls.
- Click on + NEW VIRTUAL FIREWALL button.
note
Ananta currently only supports one Virtual Firewall per Availability Zone.
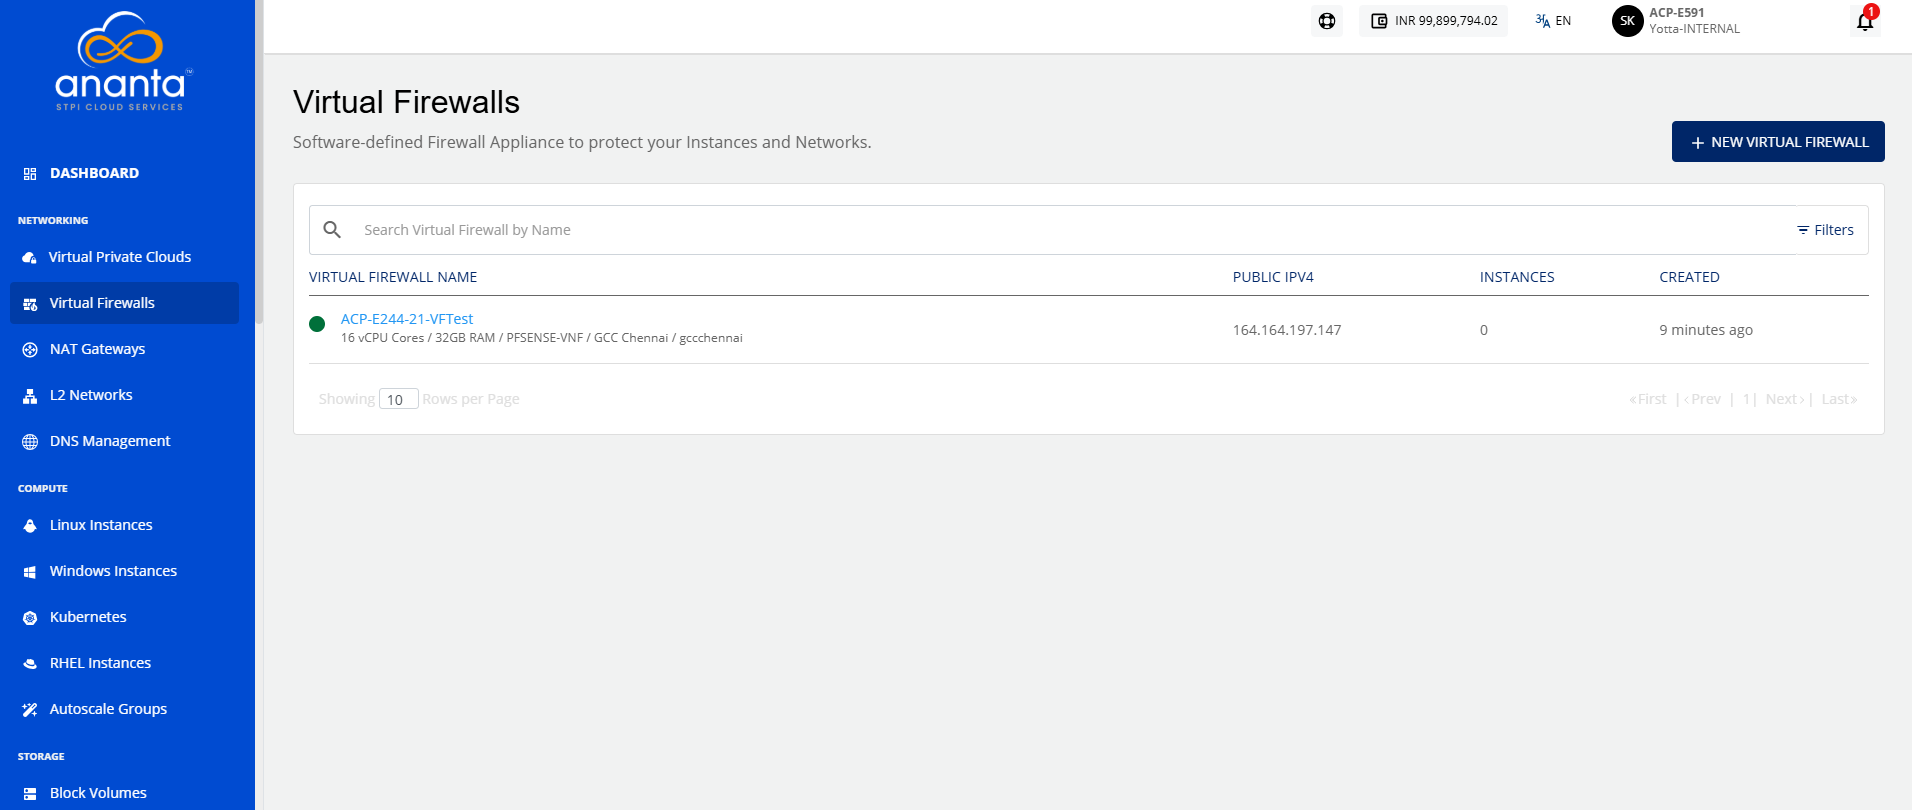
- Select your Availability Zone.
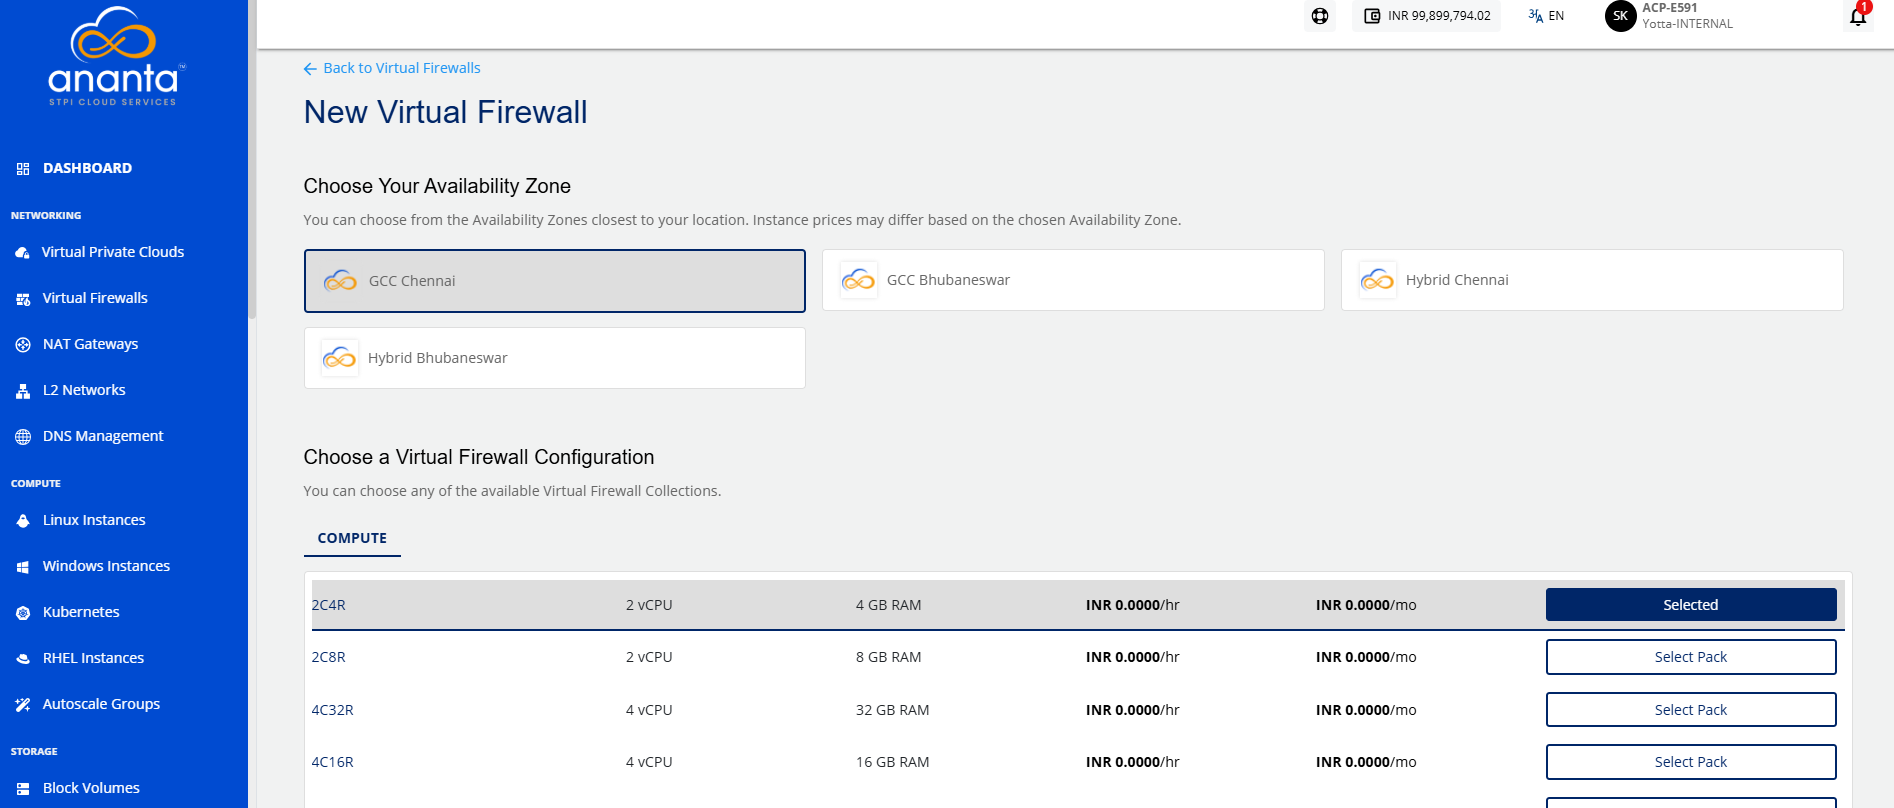
- Choose the compute pack from the list.
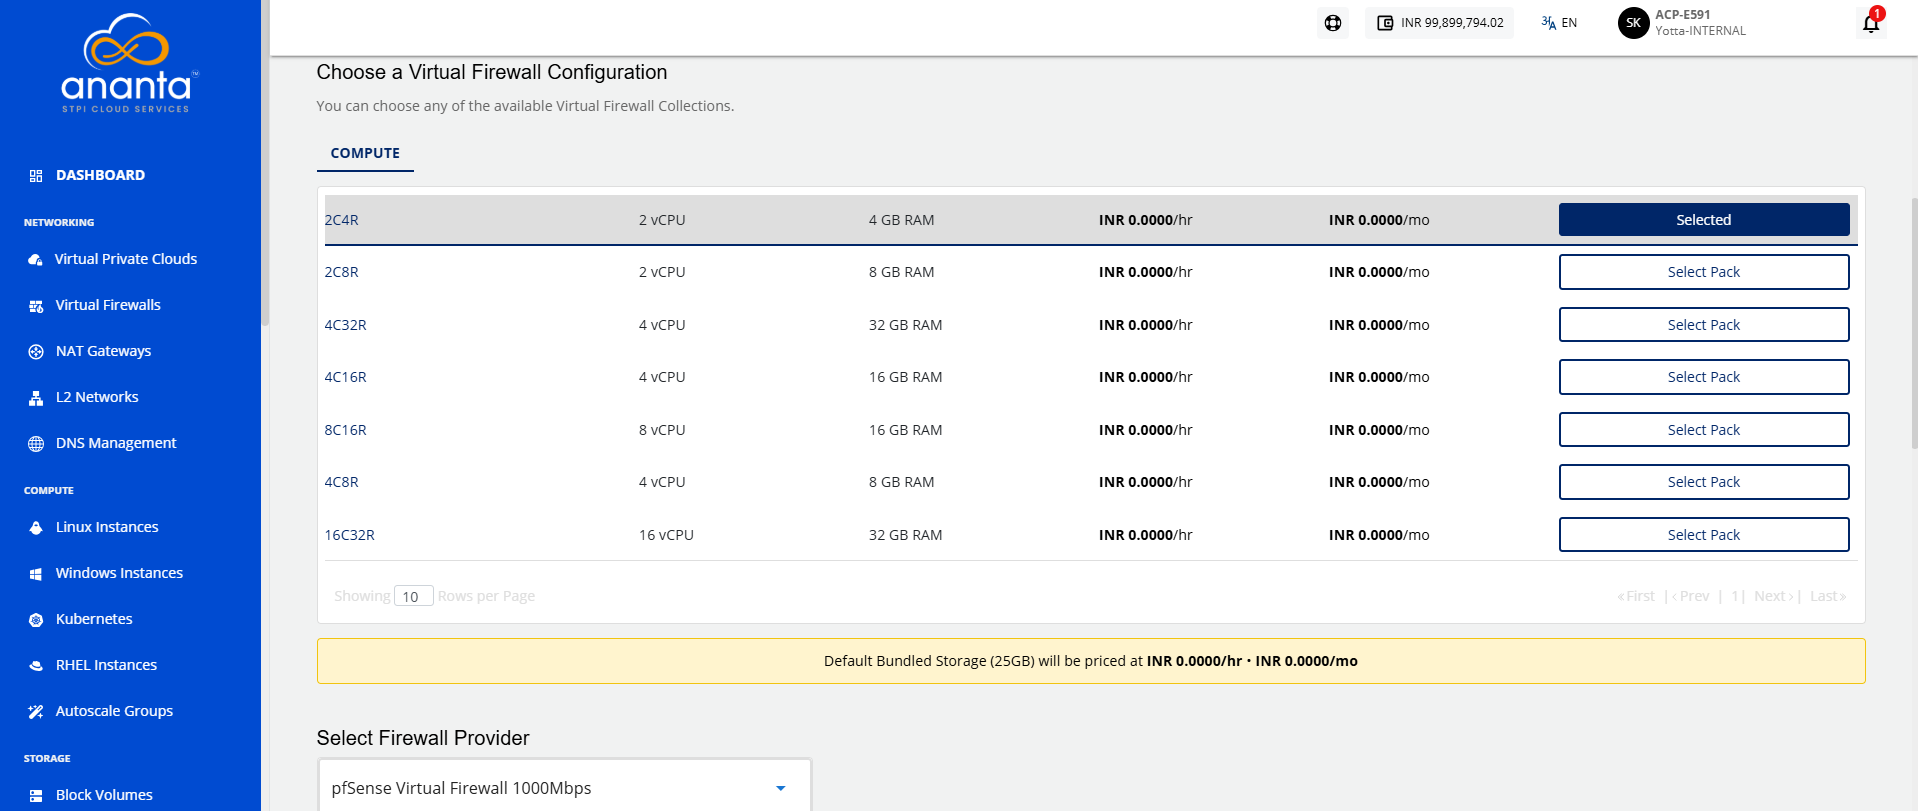
- Select the Firewall provider from the dropdown menu.
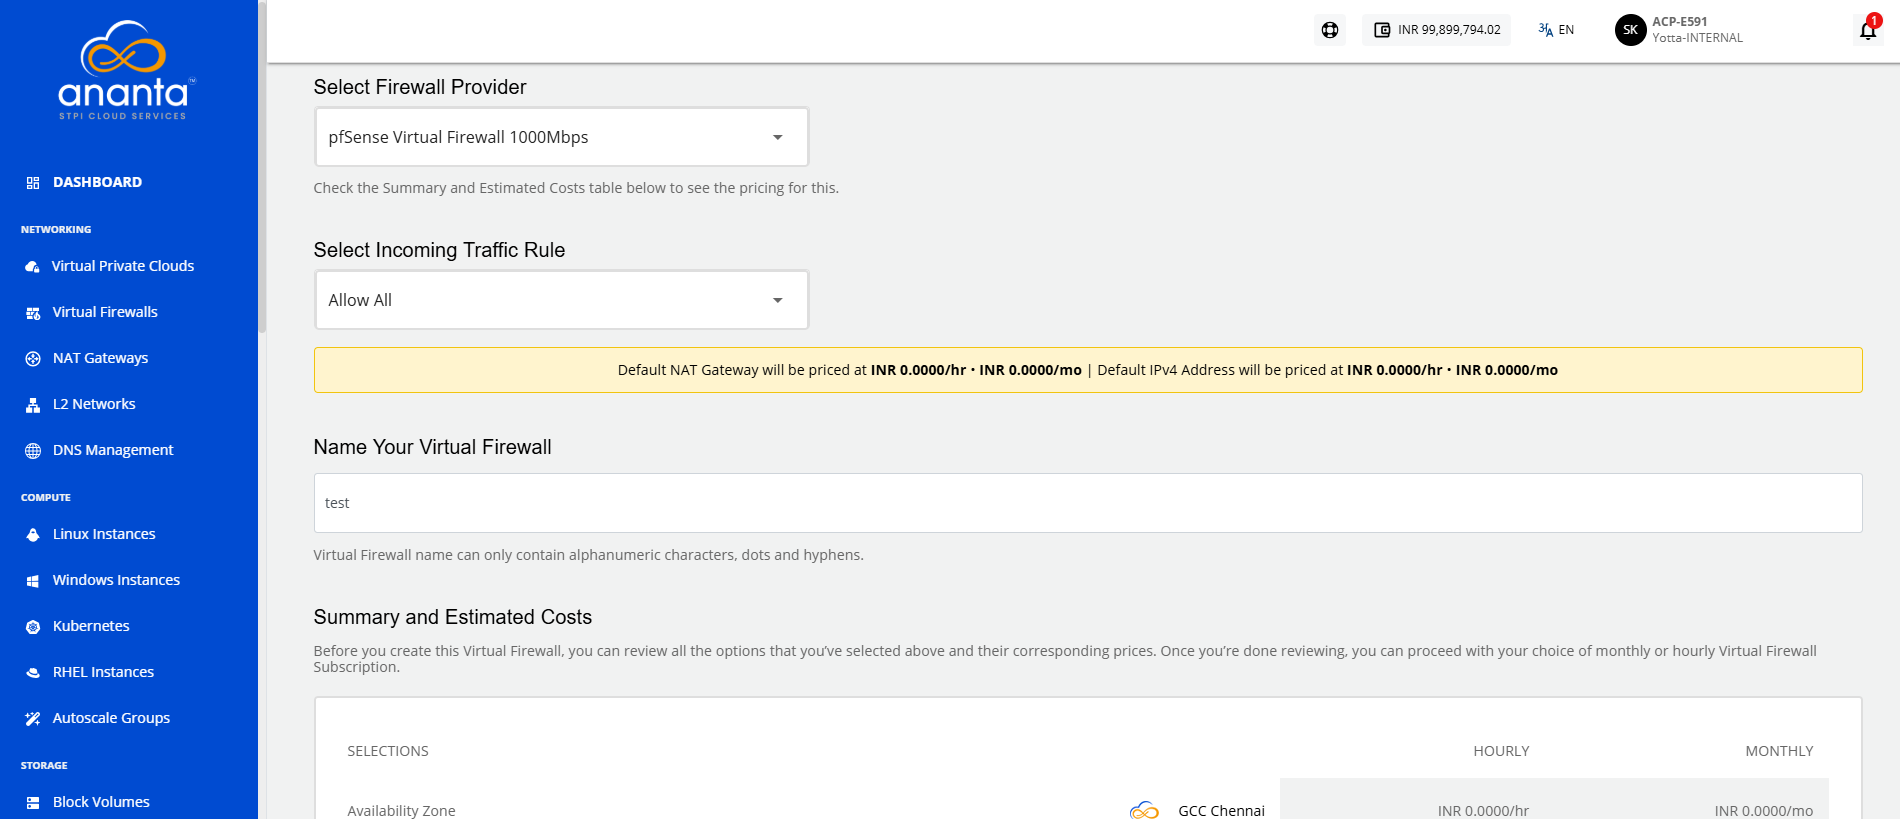
- Select the Incoming Traffic Rule (Allow All , Deny All, Allow Custom) and give name to your Virtual Firewall.
note
Allow All- Grants access to all protocols and services without restriction when selected. Deny All- Restrict access to all protocols and services when selected Allow Custom- Enable the user to specify the Source from which traffic should be allowed.
- Review the summary and estimated costs for both Hourly and Monthly options.
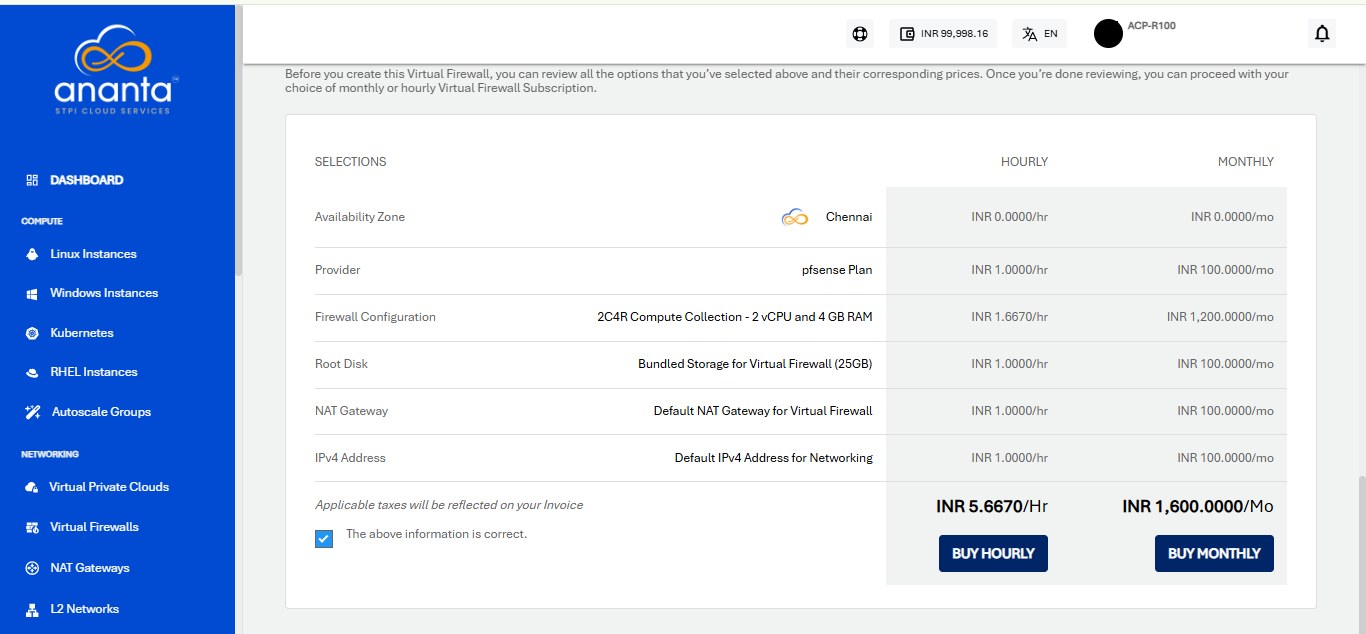
- Choose Buy Hourly or Buy Monthly based on your requirement, and then click Confirm on the confirmation popover.
The Virtual Firewall service can be configured for provisioning in a self-service or an approval-based manner.
Managing Virtual Firewall Provisioning Requests
If approval-based provisioning is enabled for the VFI Service, the following process will be followed:
- Request Submission
- A provisioning request is automatically raised to the cloud administrator.
- The requester will be notified via email once the request is approved or rejected.
- Request Status
- Upon approval or activation, the Virtual Firewall appliance becomes visible in the Virtual Firewalls list.
- Accessing the Request
- The request is available under the Requests section in the Support & Operations menu on the Ananta admin console.
- Admin Actions
- The administrator can:
- Review the request
- Approve or reject the request
- Enter any custom price overrides
- Click OK to finalize the action
- The end user and the admin will receive an email notification regarding the request status.
- The administrator can:
- End User Notification
- If the request is approved, the end user will receive an additional email with- Subscription details, Service access information.