Using Remote Access VPN with VPC
To use a VPN client to connect to your VPC, follow these steps:
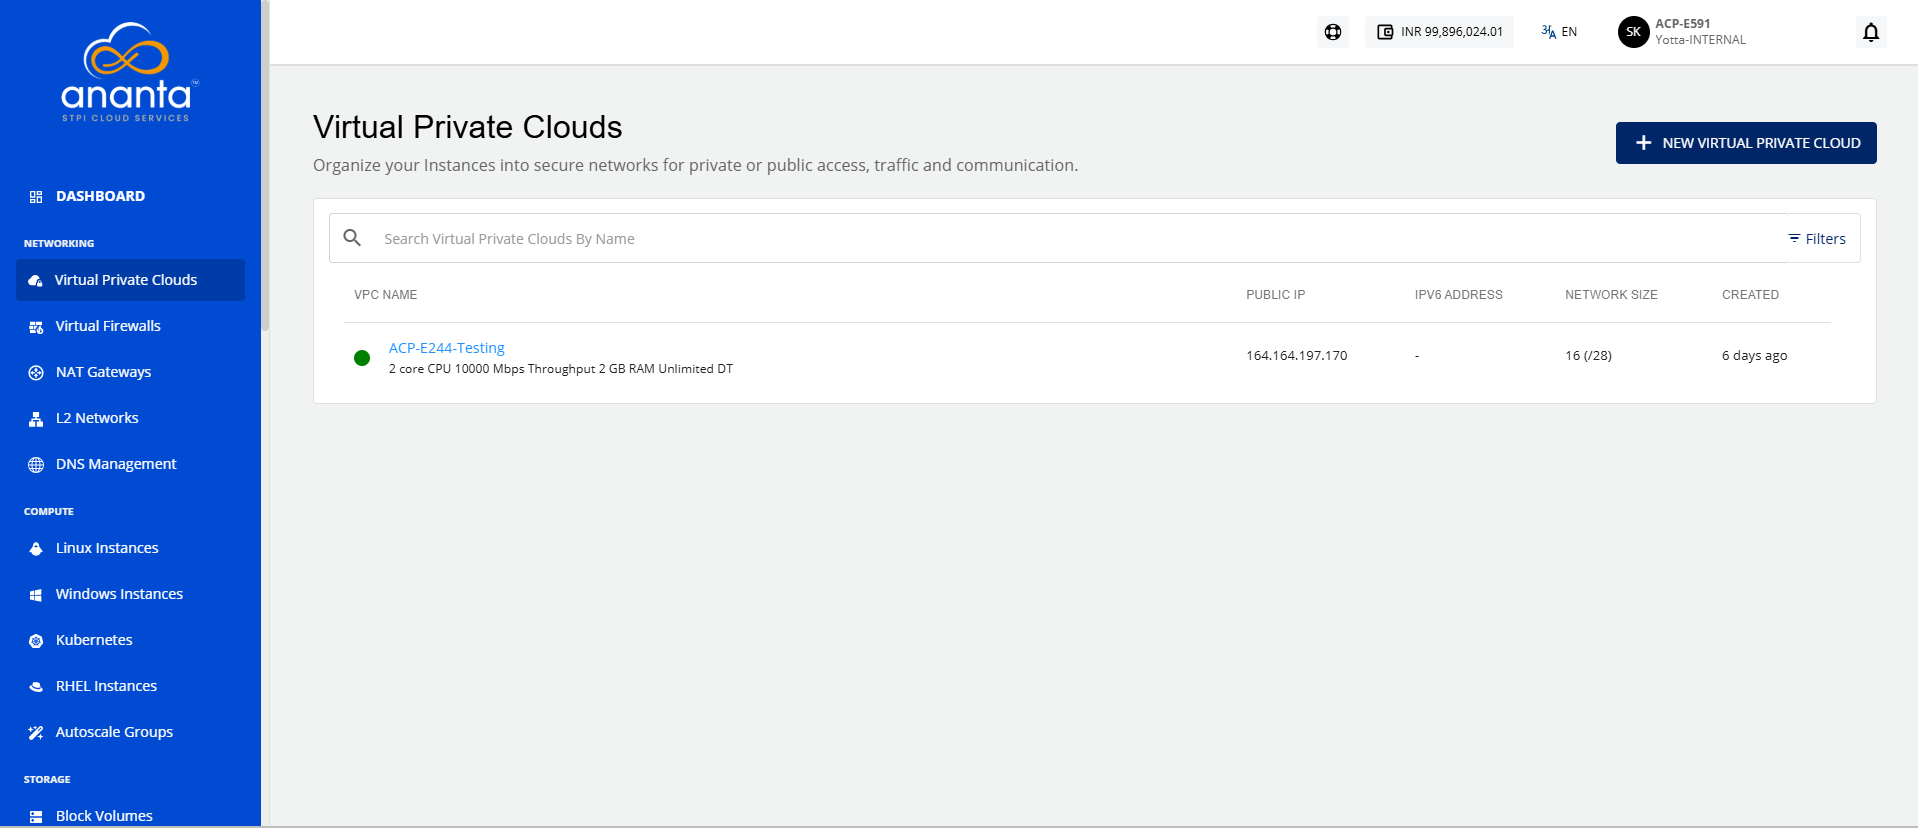
- Navigate to Networking > Virtual Private Clouds from the main navigation panel and enter the VPC that you wish to connect using your VPN client.
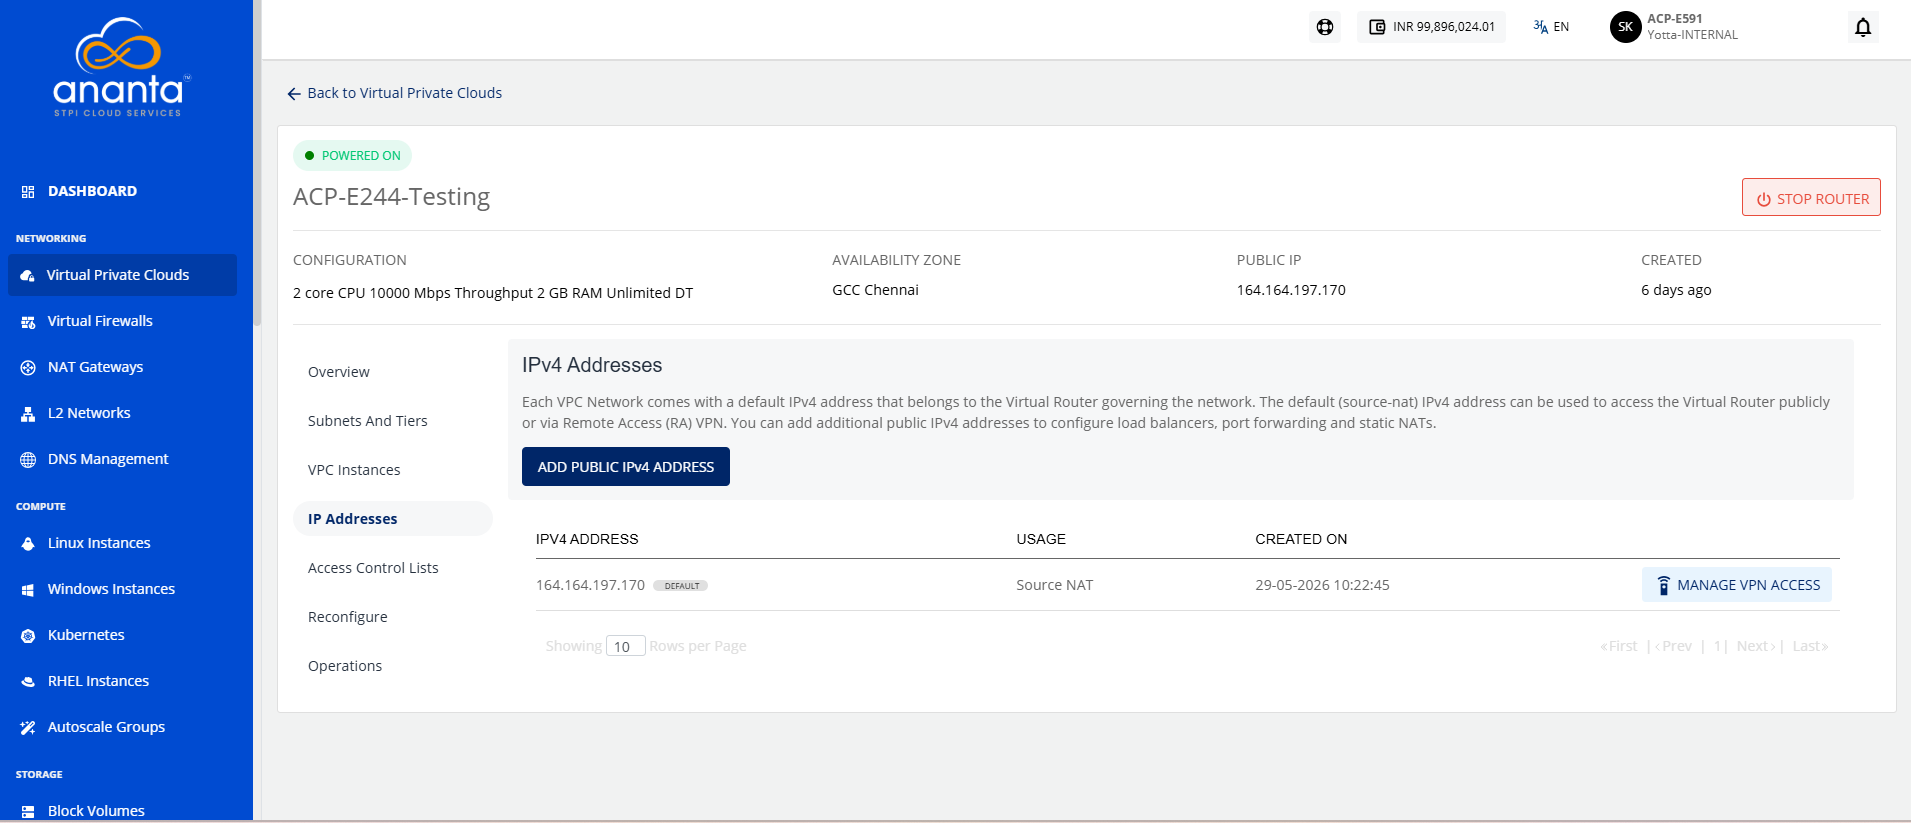
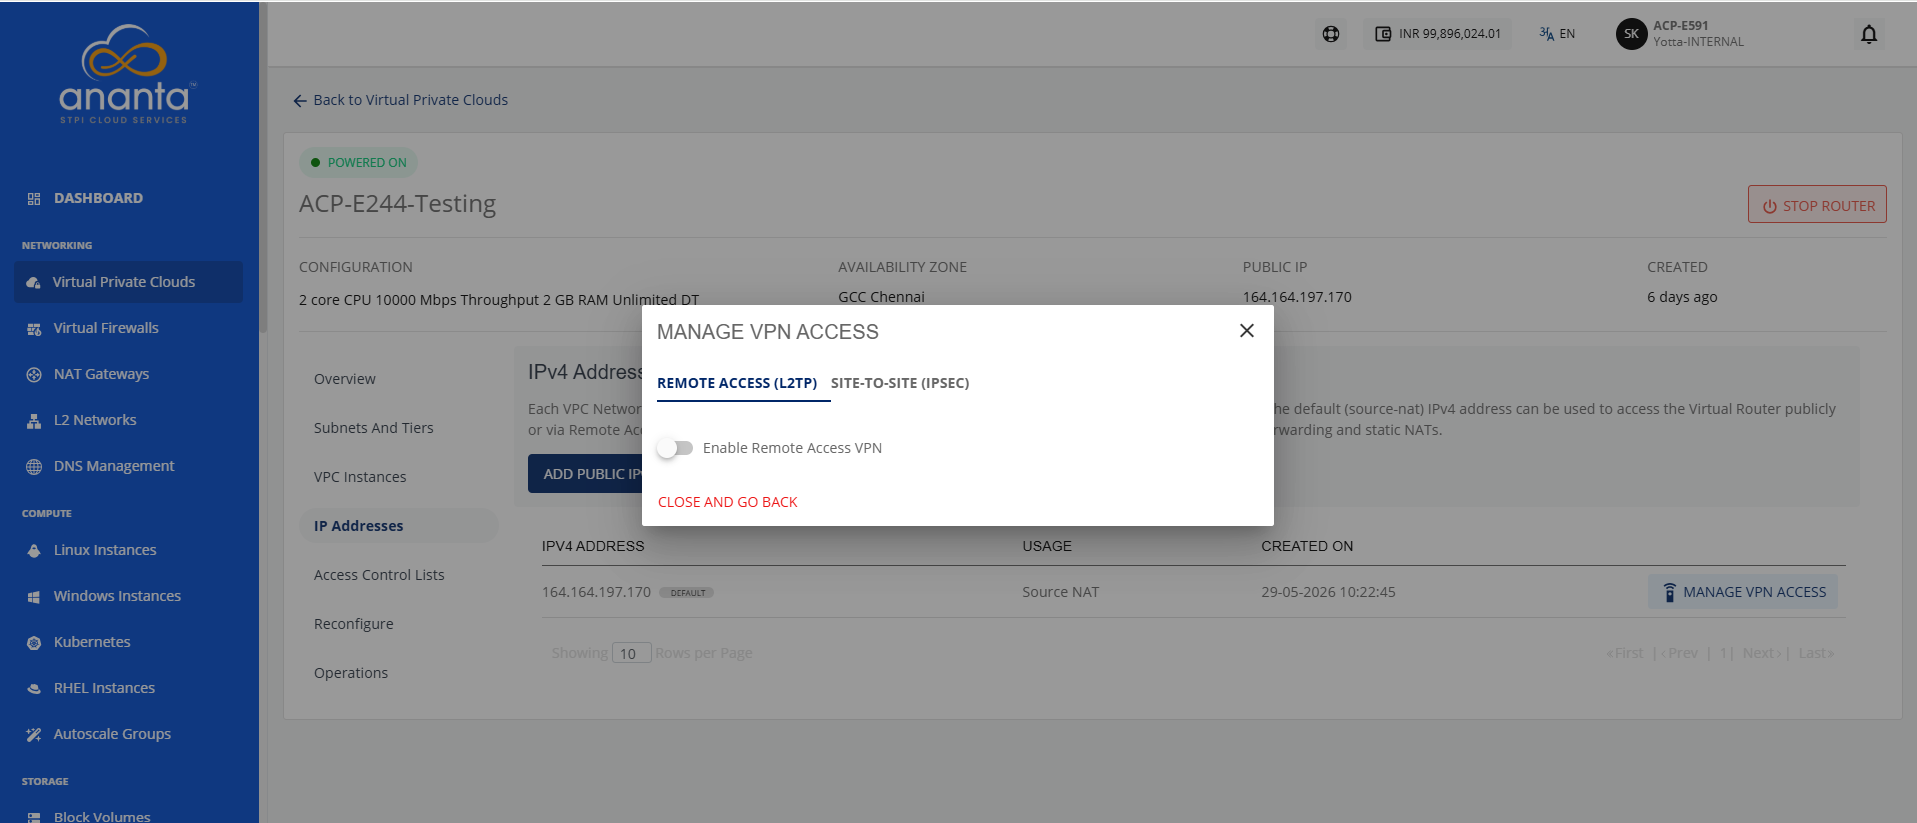
- To enable the switch for the Remote Access VPN, navigate to VPC, Click the Manage VPN access available under the IPv4 ADDRESSES section, then click the Remote Access (L2TP) option.
- This will also enable the Remote Access VPN button for the VPC’s default IP. Click the button to copy the pre-shared key (PSK) and the IP range from the dialog box to use in your VPN client.
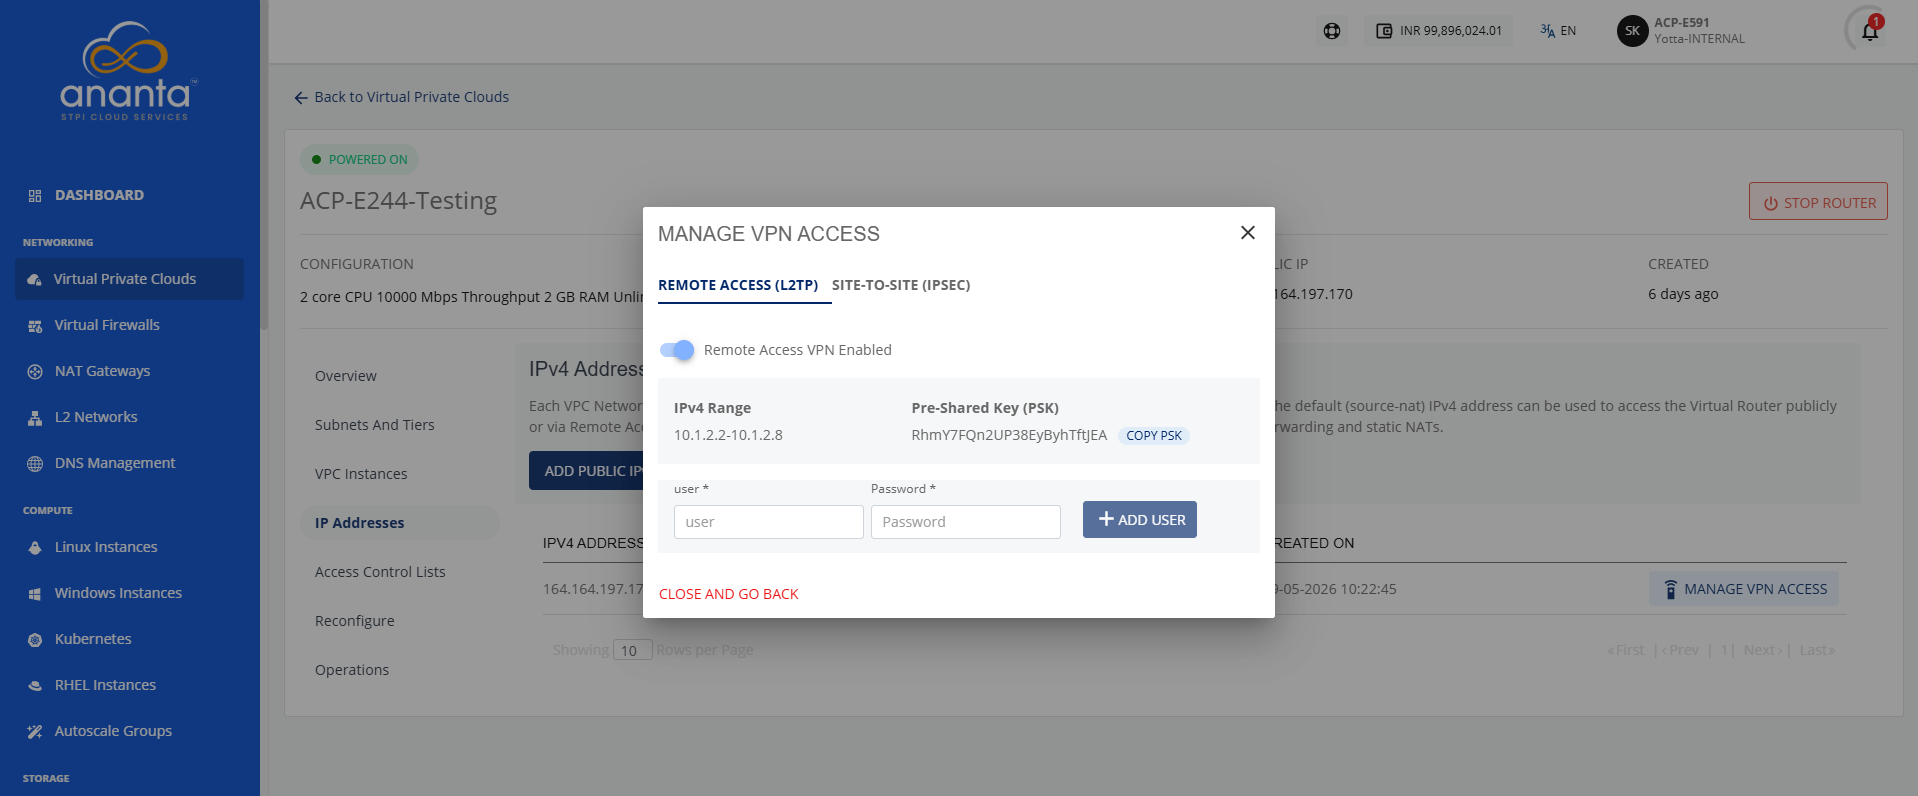
- Additionally, you’ll need to add VPN user credentials here.
To test this configuration, you can open the VPN client on your local system and try connecting to the VPC.
Configuring VPN on Windows
To configure a VPN Connection on Windows using Native VPN client, follow these steps:
- Open the Control Panel, navigate to Network and Internet.

- Select Network and Sharing Center.
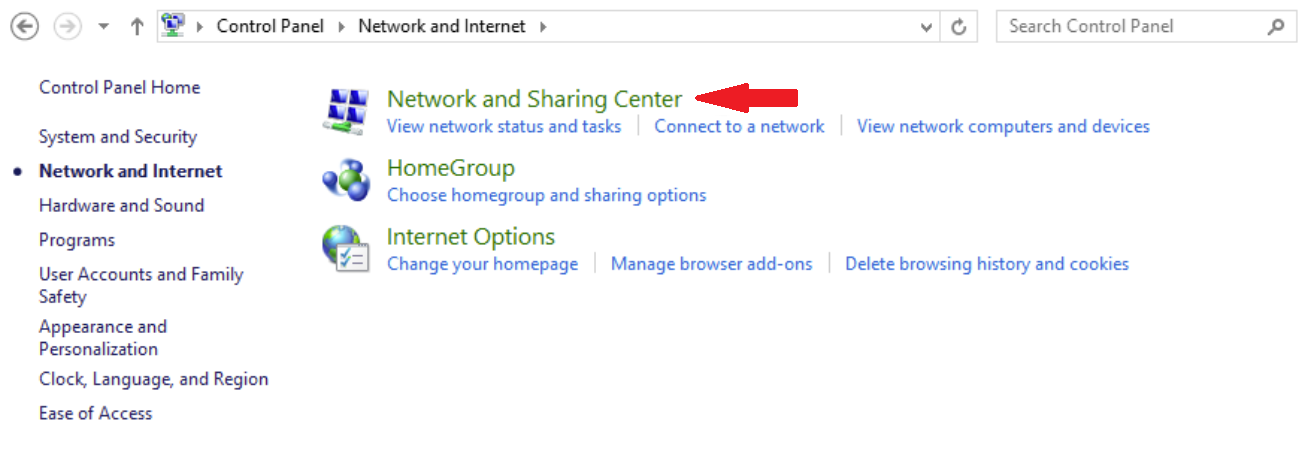
- Under Change your networking settings, click Set up a new network connection or network.

- The following window appears. Select Connect to a workplace, and click Next.

- Select the Use my Internet connection(VPN) option.

- The following window appears. Enter the Internet address (refer IPv4 Address from point 2 under Using Remote Access VPN with VPC ).

- Select the Remember my credentials option, and click Create.
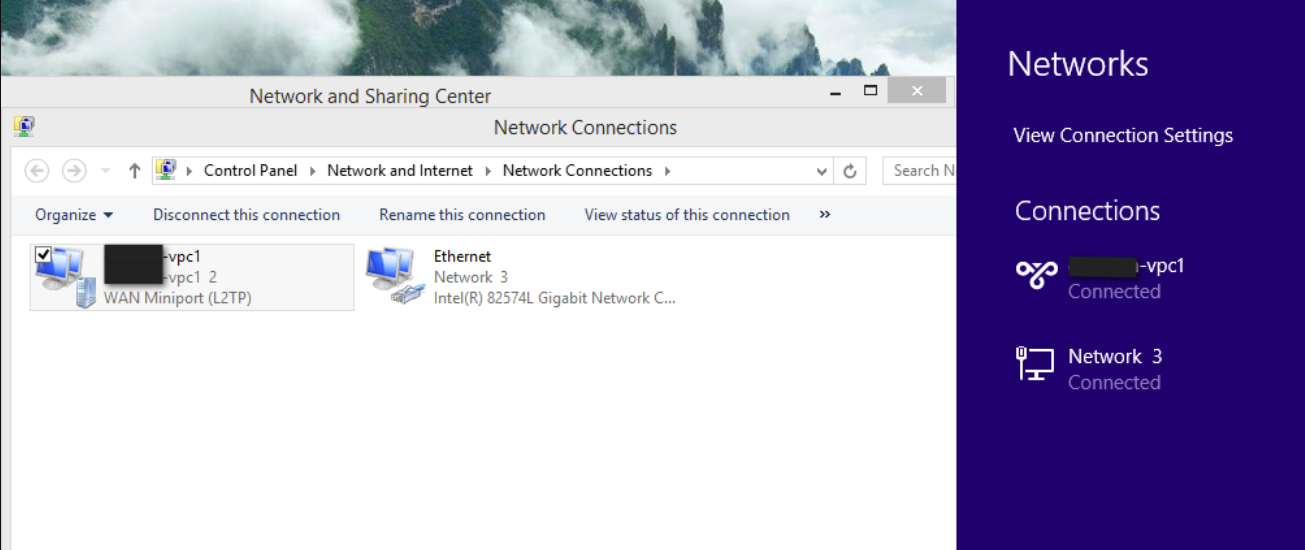
- To configure VPN settings, open Network and Sharing Center, and click Change adapter settings.

- Navigate back to Network and Internet, then select Network Connections.

- Locate your VPC network, right-click on it, and select Properties.
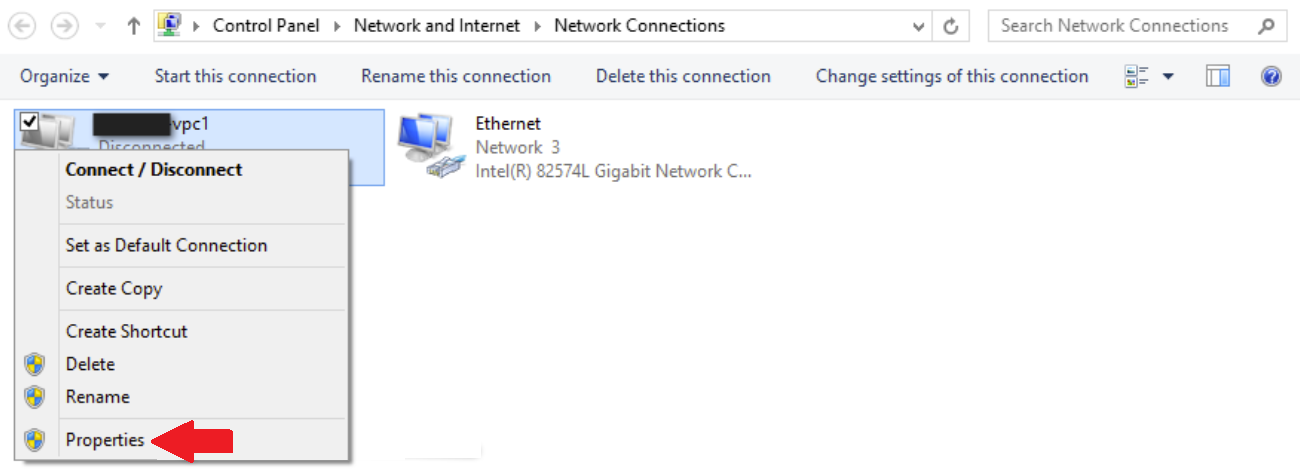
- The Properties window appears:

- In the Properties window, navigate to the Security tab.
- Under Type of VPN, select L2TP/IPsec.
- In the Data Encryption field, choose Require encryption.
- Select the Allow these protocols option.
- Select Microsoft CHAP Version 2(MS-CHAP v2).
- Click the Advanced settings button. The following window appears:

- Select the Use pre-shared key for authentication option (for pre-shared key refer to point 3 under Using Remote Access VPN with VPC ).
- Click OK to save your settings.
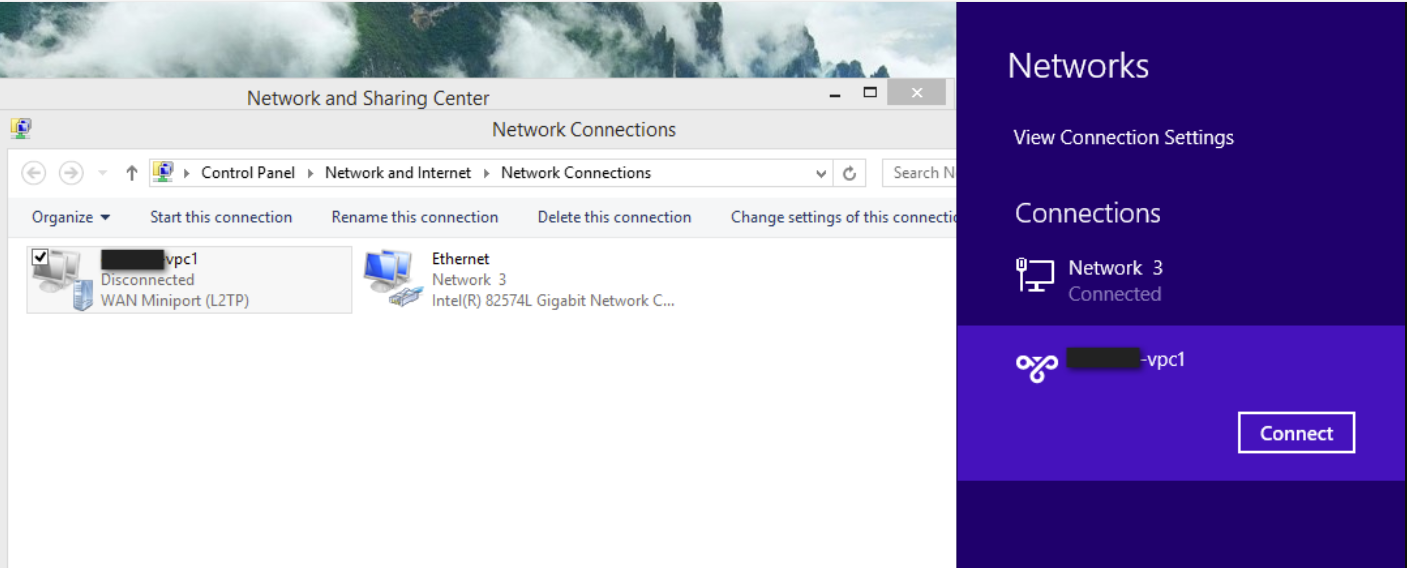
- To initiate the VPN connection, navigate to Network > Connection Settings, then click Connect.
- Enter your Username and Password, click OK.
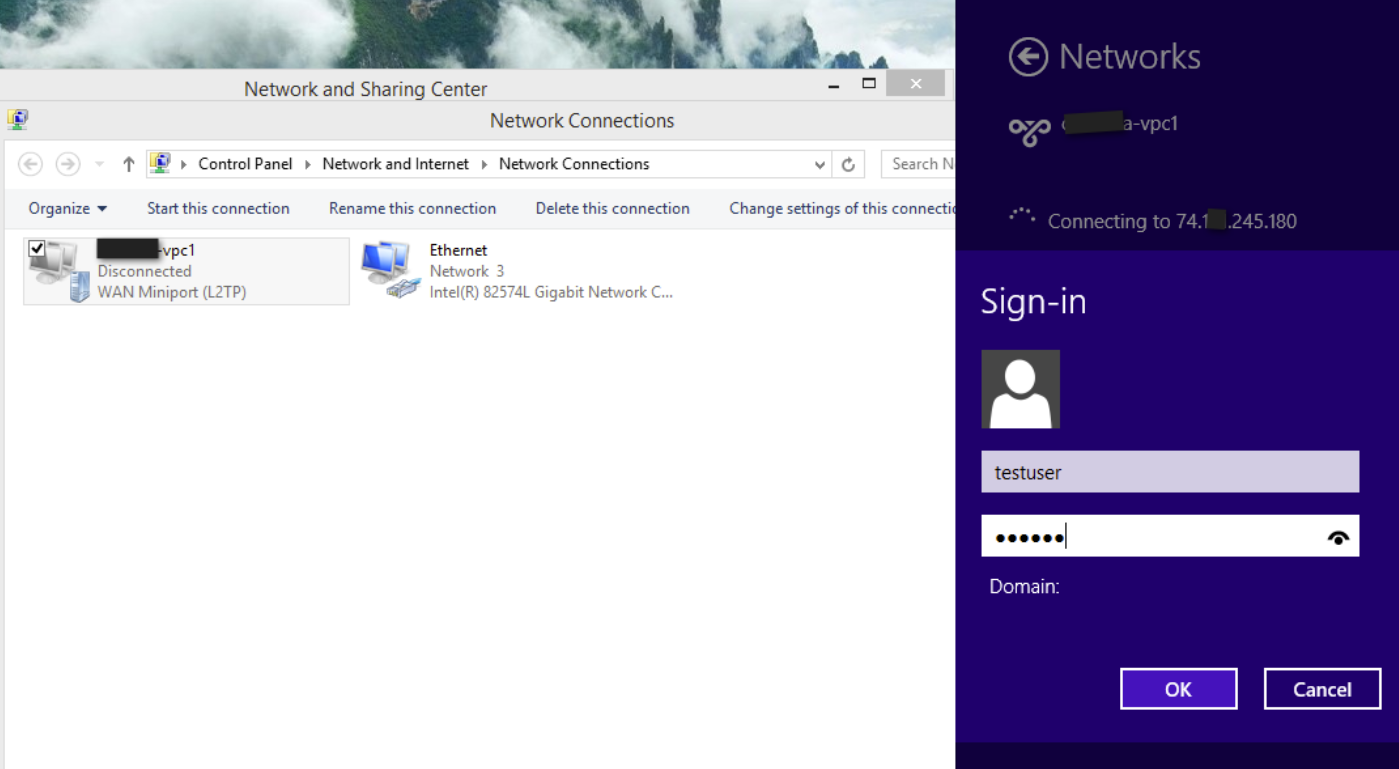
The configuration is successful.
Configuring VPN on macOS
Remote Access VPN connection to VPC or Guest Network to access Instances and applications. This section considers you have enabled Remote access VPN, refer to Remote Access VPN
When connected to a VPC via VPN, the client have access to all Tiers.
To configure VPN client, the following information is required:
- Public IP: source NAT with VPN enabled.
- IPsec pre-shared key: Provide at the VPN activation.
- Username VPN account username.
- Password VPN account password. To configure a VPN Connection on macOS using Native VPN client, follow these steps:
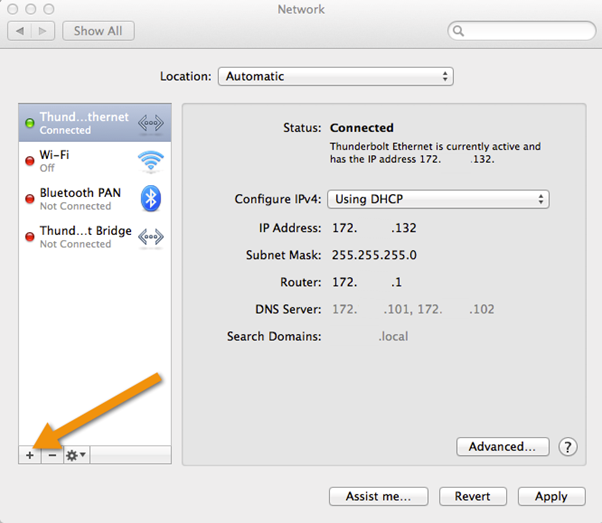
- Navigate to Preferences > Network.
- To add the VPN, Click the + button.
- Enter the following details:
- From the Interface drop-down, select VPN.
- From the VPN Type drop-down, select L2TP over IPSec.
- Enter the Service Name (for example: test-vpc1).

- Click Create. The details get listed in the panel on the left.
- Select the Service. The following screen appears:

- Click Authentication Settings.
- Under the User Authentication section, enter the Password.
- Under the Machine Authentication section, enter the Shared Secret.

- Click OK. The following screen appears:
- Click Apply to apply Network configuration changes.
- Click Connect to initiate VPN connection.
