Managing Custom Templates and Images
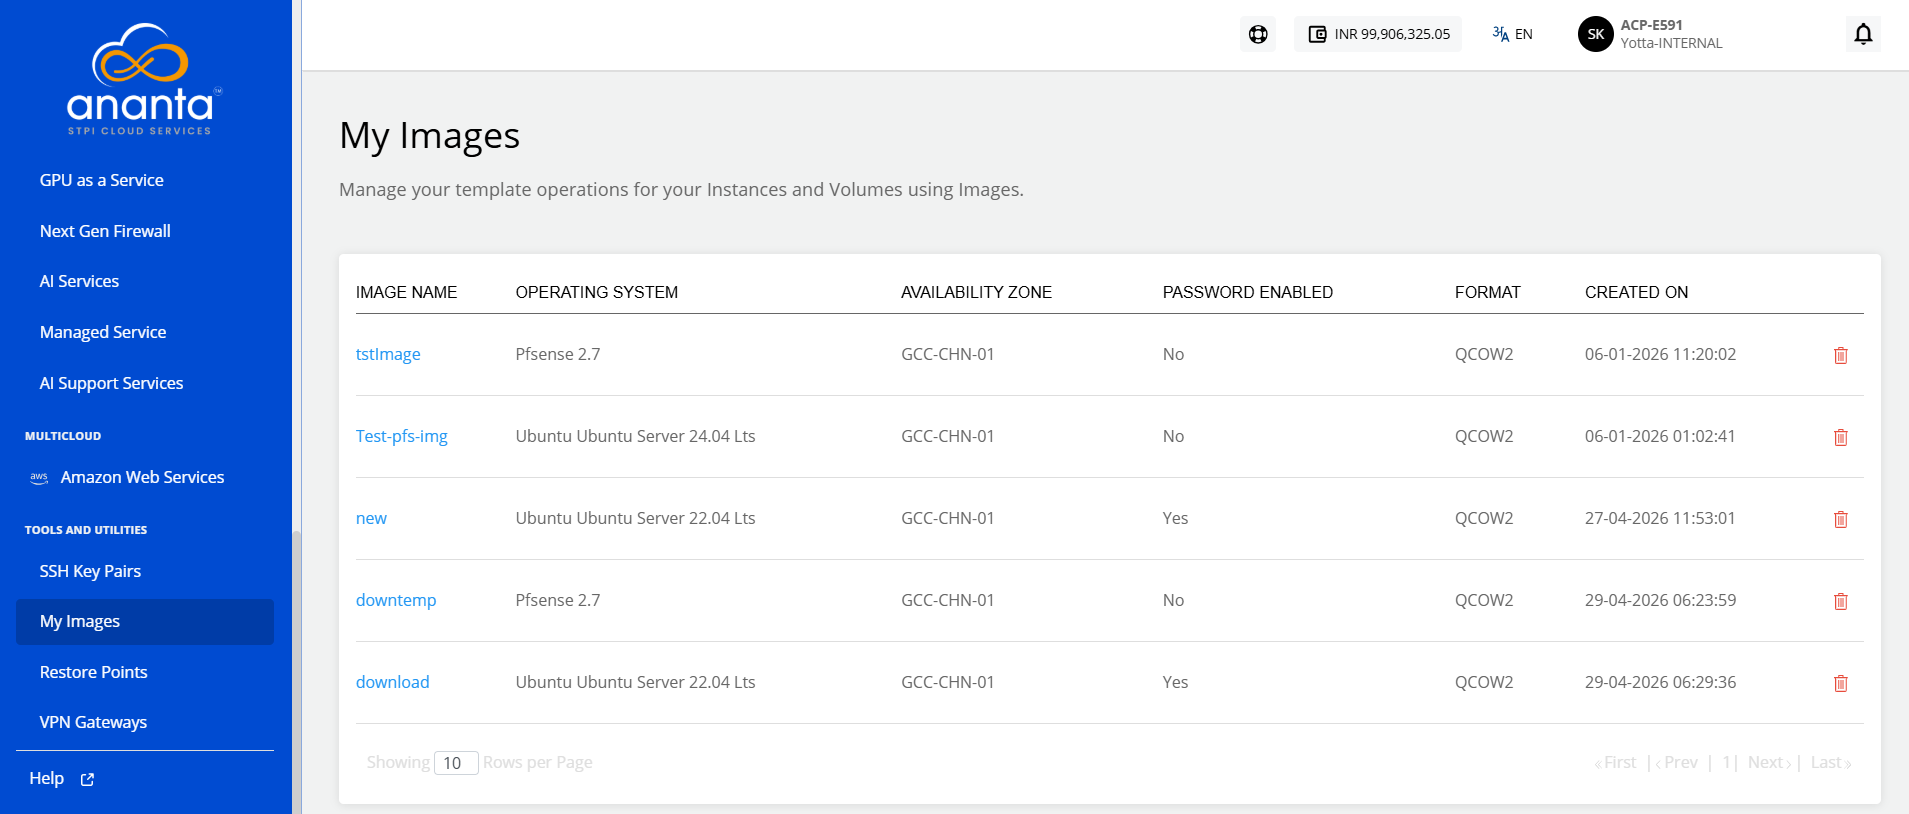
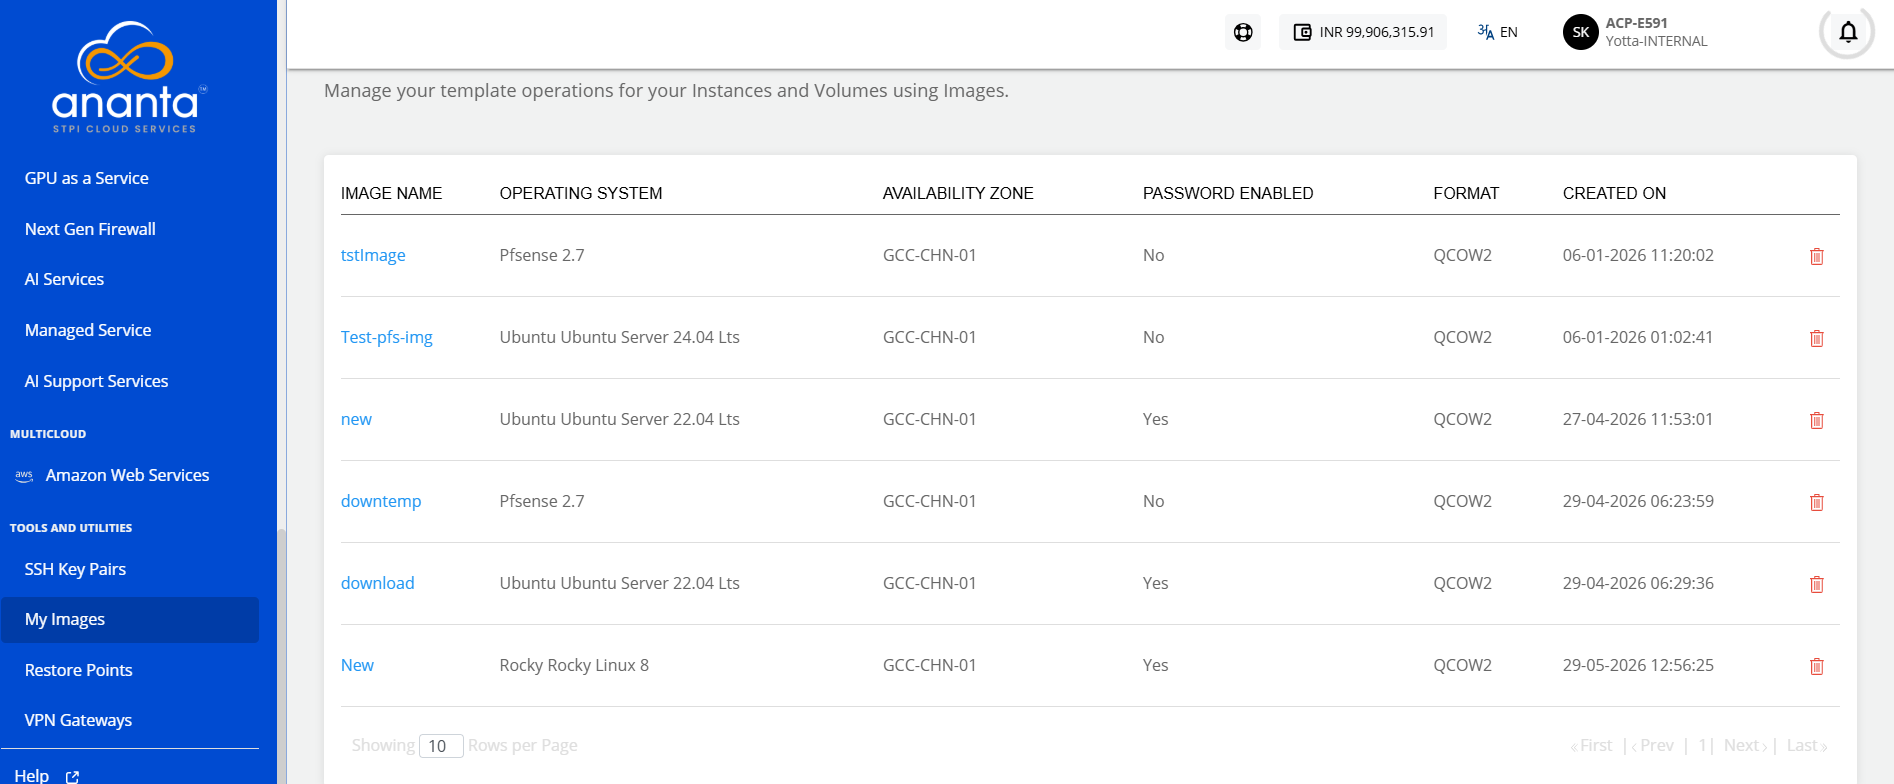
You can create custom OS templates from a Restore Point. To locate these custom templates, navigate to Tools and Utilities > My Images with the following details:
- Image Name
- Operating System
- Availability Zone
- Password Enabled
- Format
- Created On
Creating Custom Images
To create custom images, follow these steps:
- Navigate to Compute > Linux Instances. The following screen appears:
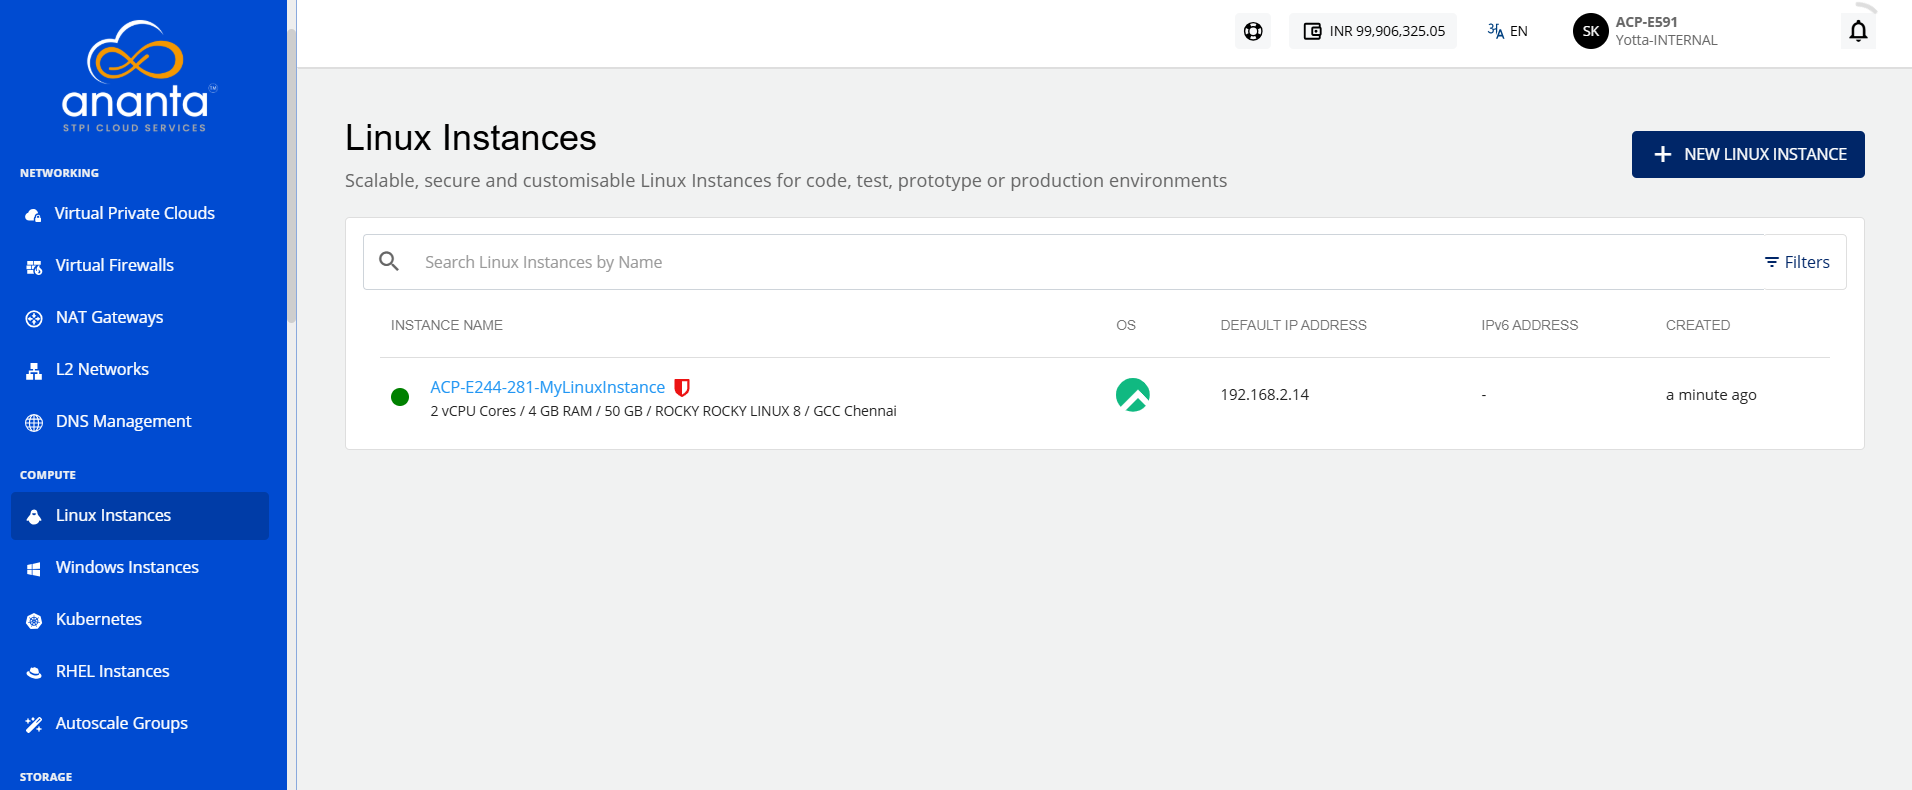
- Click the Instance Name.
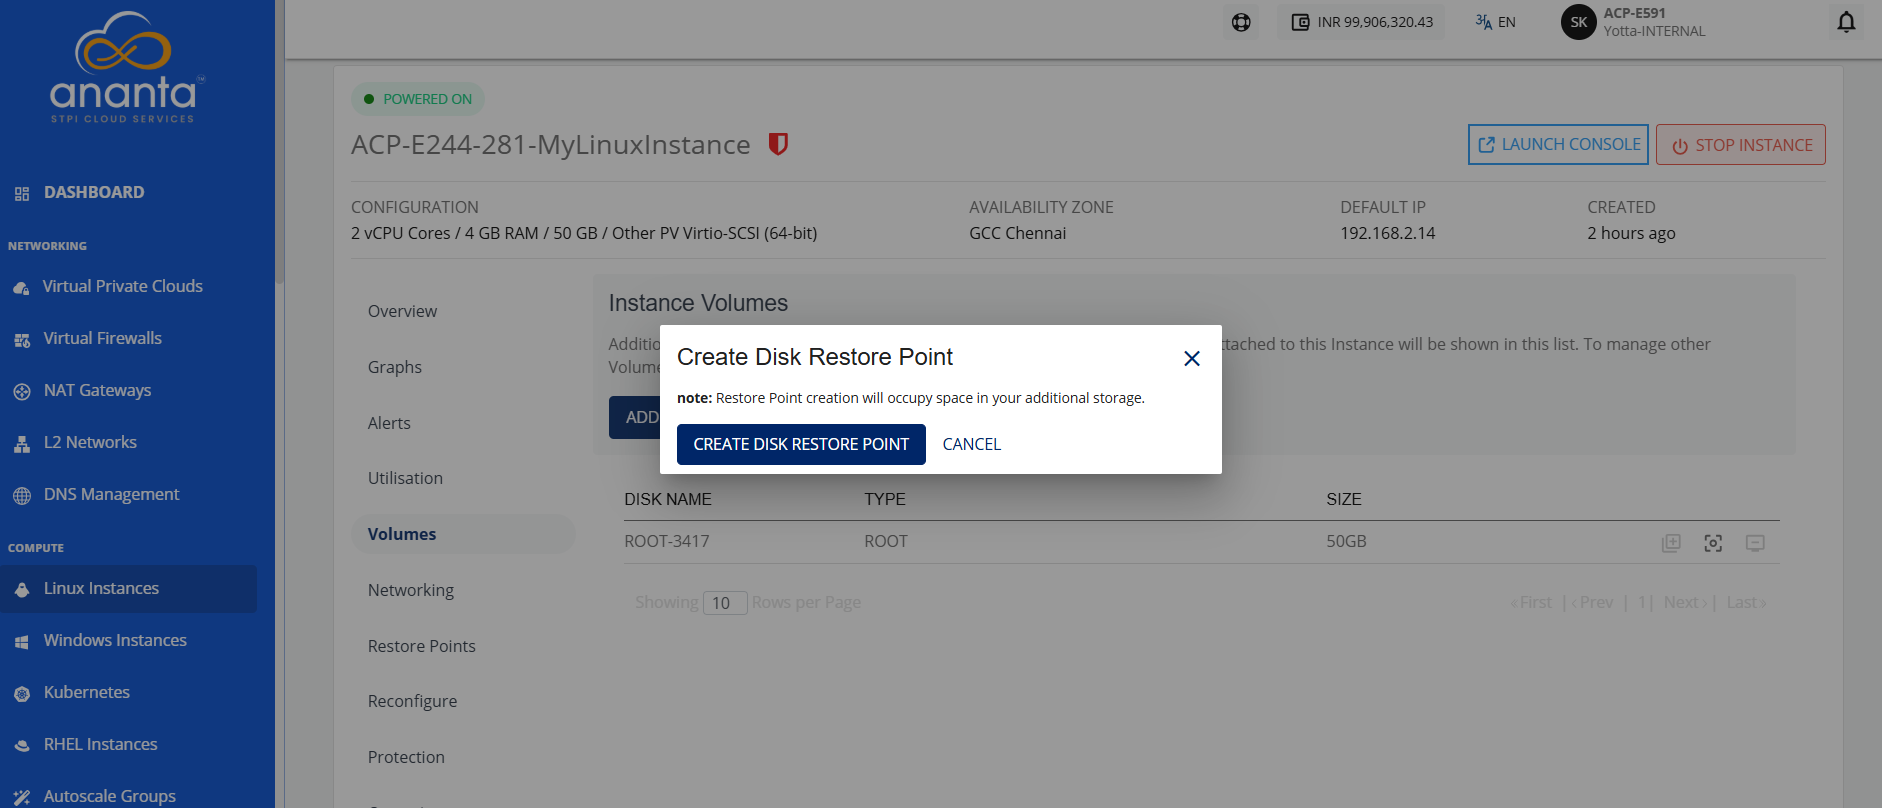
- Click Volumes to view the attached volumes or data disks.
- Click the CREATE RESTORE POINT icon to create a restore point for the selected volume.
- Navigate to TOOLS AND UTILITIES > Restore Points.
- Navigate to Disk Restore Point to view the newly created restore point. The following screen appears:
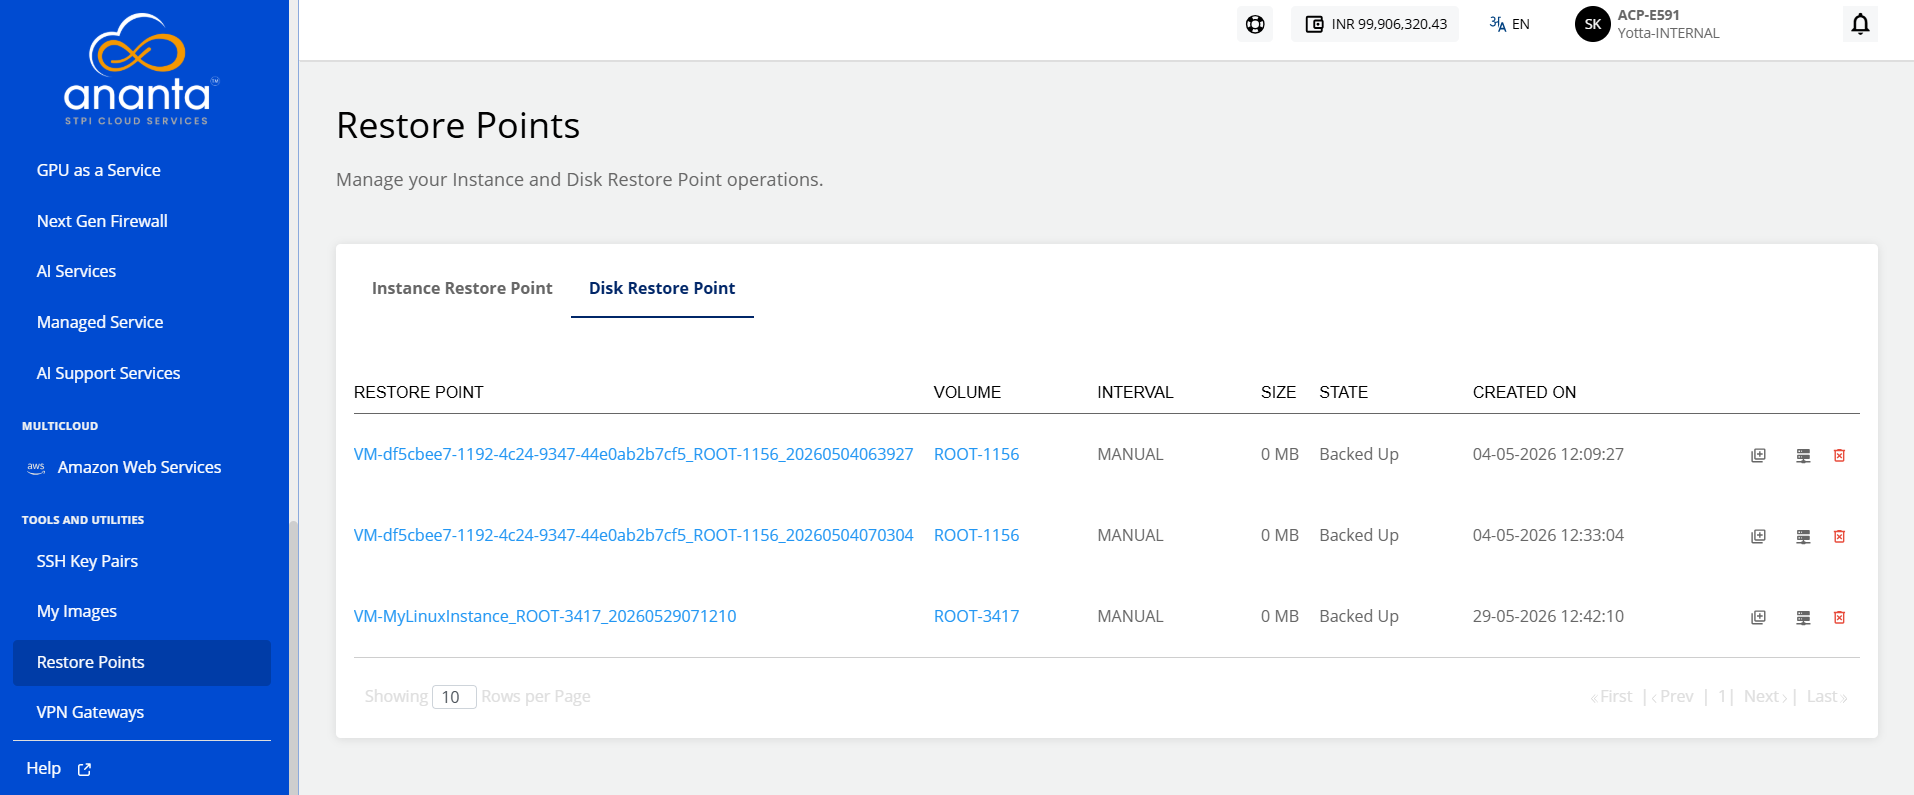
- Click the Create Image icon for the newly created Disk Restore Point. The following screen appears:
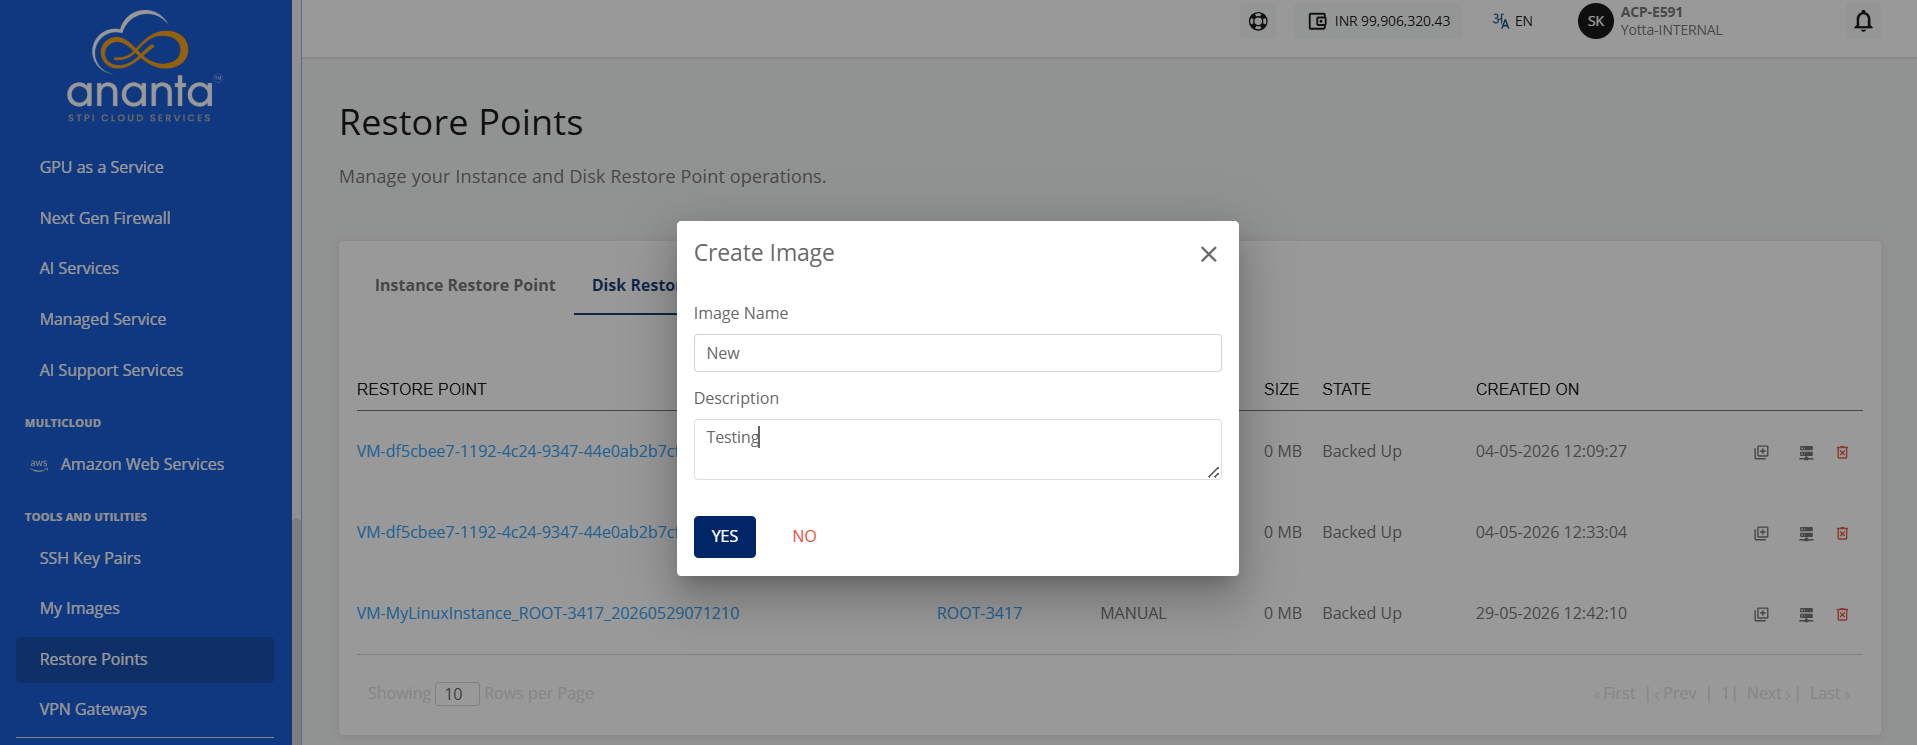
- Provide the following details:
- Image Name
- Description
- Click Yes to confirm and create the image.
- Navigate to TOOLS AND UTILITIES > My Images to view the newly created custom image.
Deleting a Custom Image
You can delete an image by clicking the delete icon.
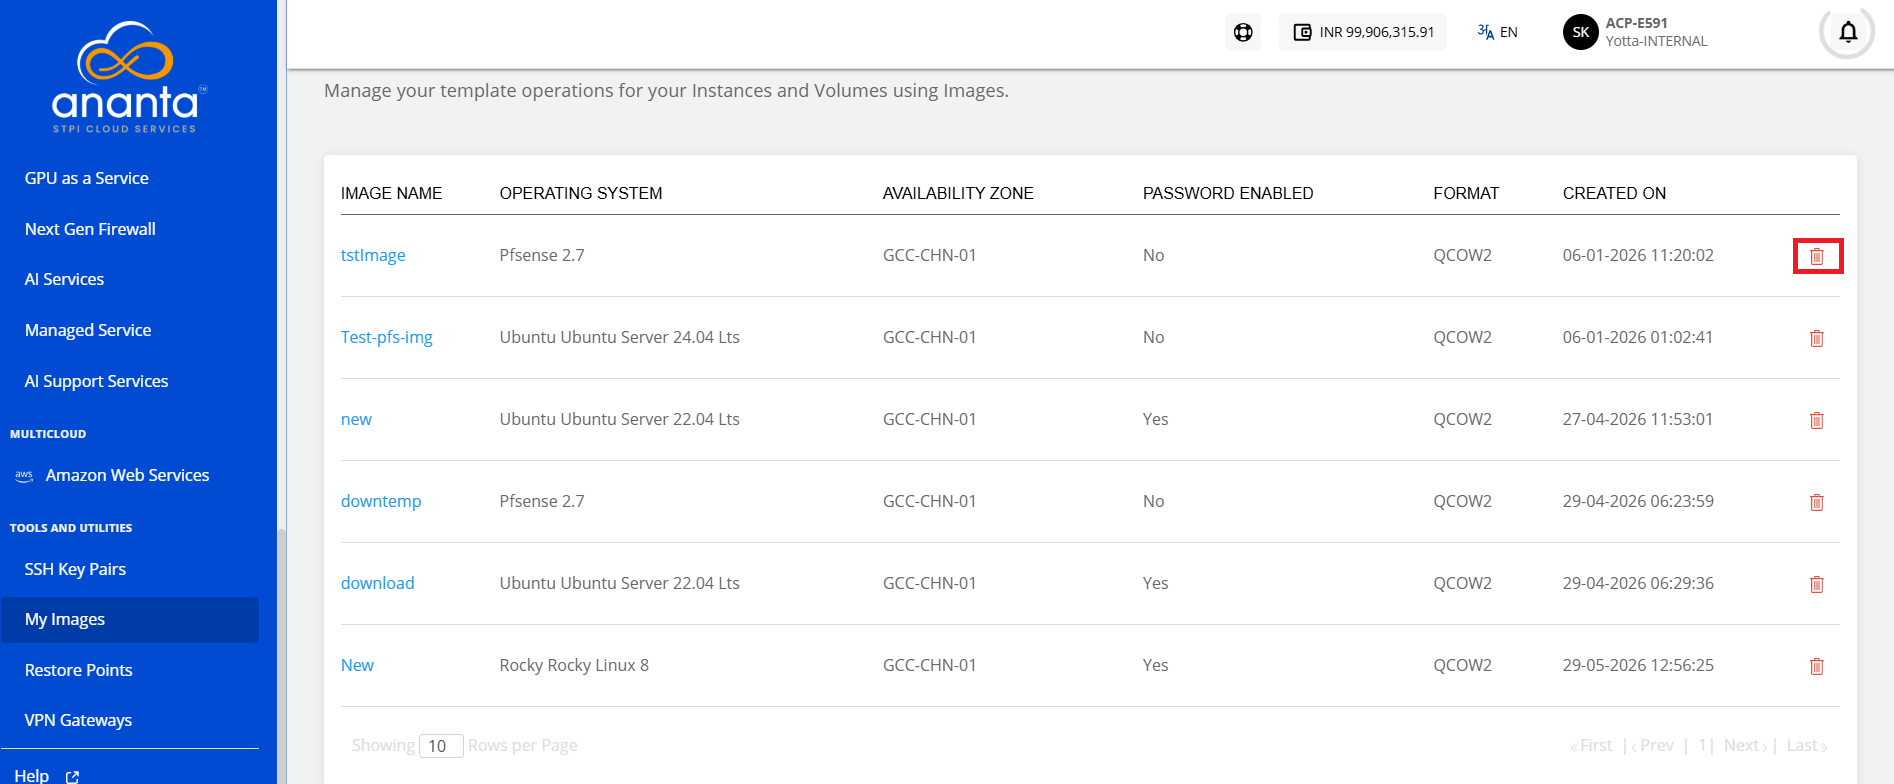 You can also check the status by clicking the image name.
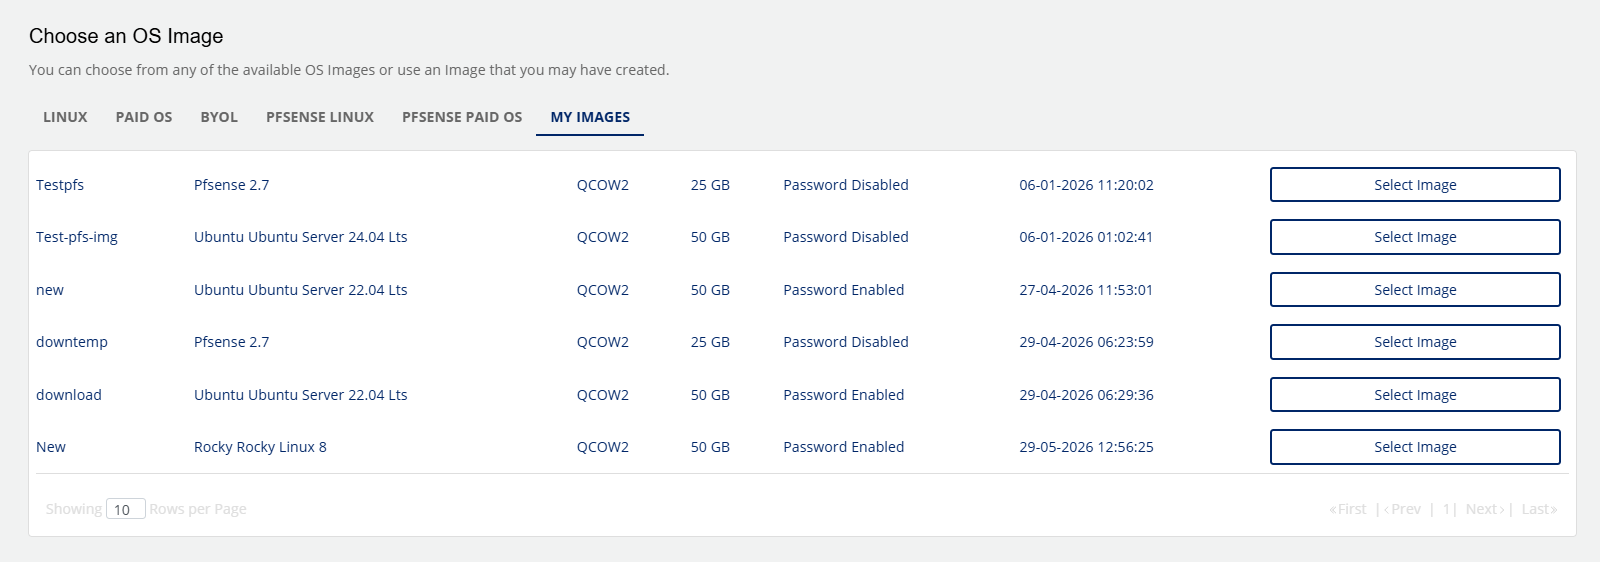
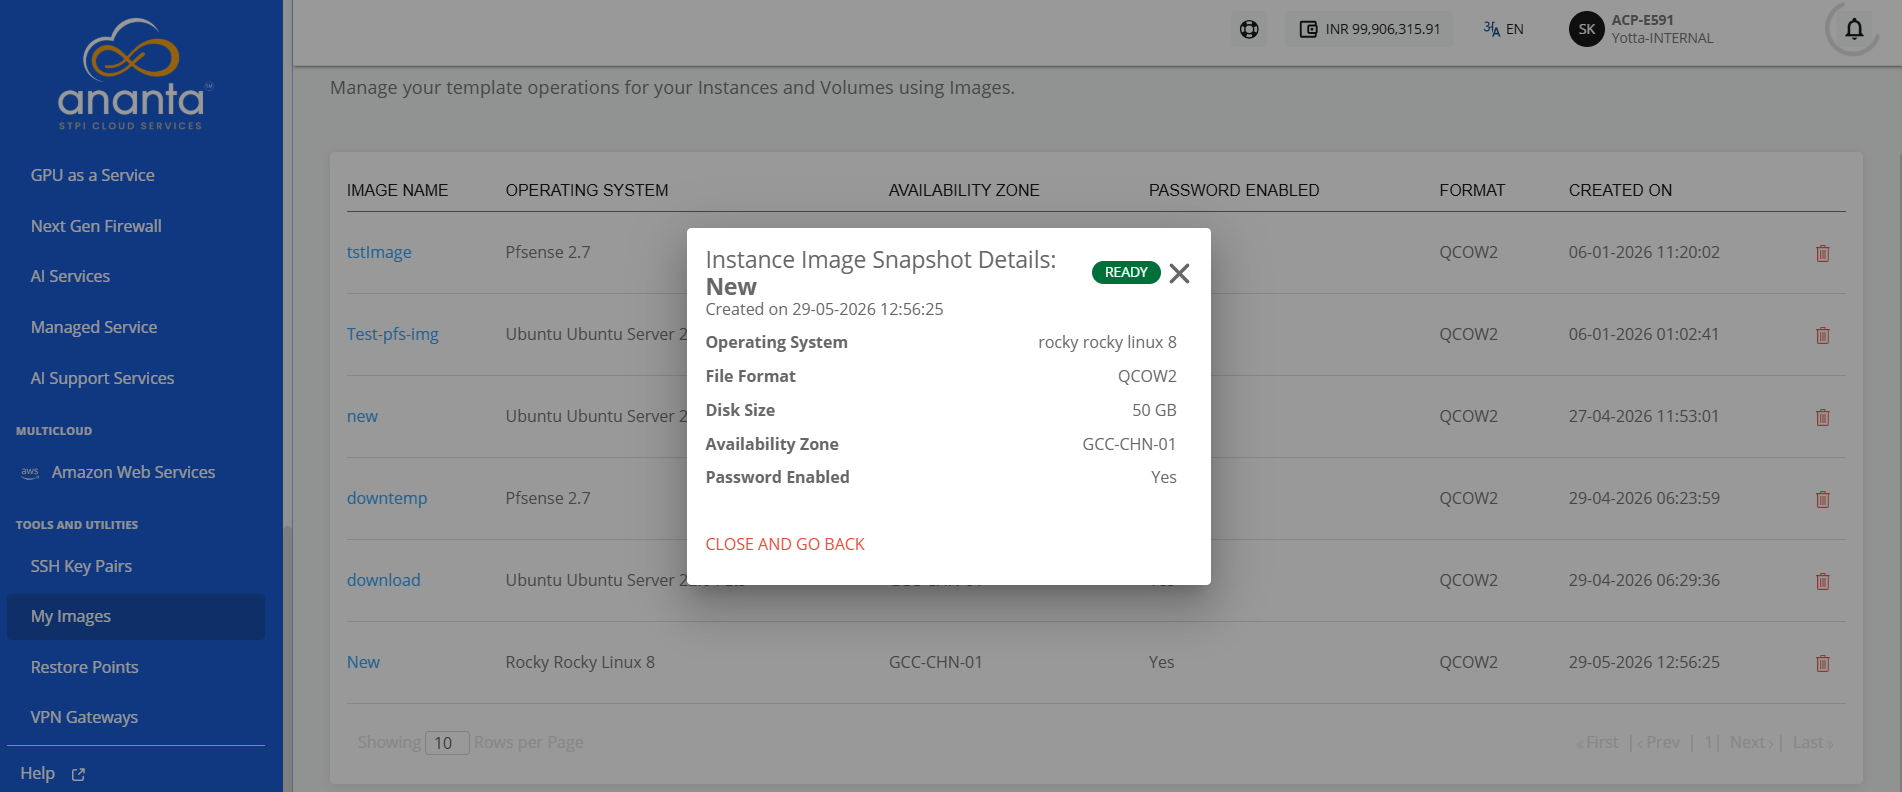 You can use these Images while creating new Linux or Windows Instances.
Uploading Custom Image
You can upload your own instance image to the Ananta Cloud by submitting a request to the support team. Prepare the instance image in the QCOW/QCOW2 format and make it accessible through a downloadable URL.
You can raise a support request by any of the following methods:
- Email: support@ananta.stpi.in
- Toll-Free Support Number
- Raise a ticket to the support team (Account Centre > Support & Tickets)
Include the instance image URL and the required details in the request.
After the support team validates and uploads the image, the system adds it as a template and makes it available under the My Images tab in the Ananta Cloud portal for the instance creation.