Networking Management with RHEL Instances
This section explains how to manage the network settings of your RHEL instances. You can add a network to connect an instance to a virtual network and assign secondary IP addresses to enable multiple network connections on the same instance. This helps you configure and manage your networking requirements more efficiently.
The following are the major topics covered in this section:
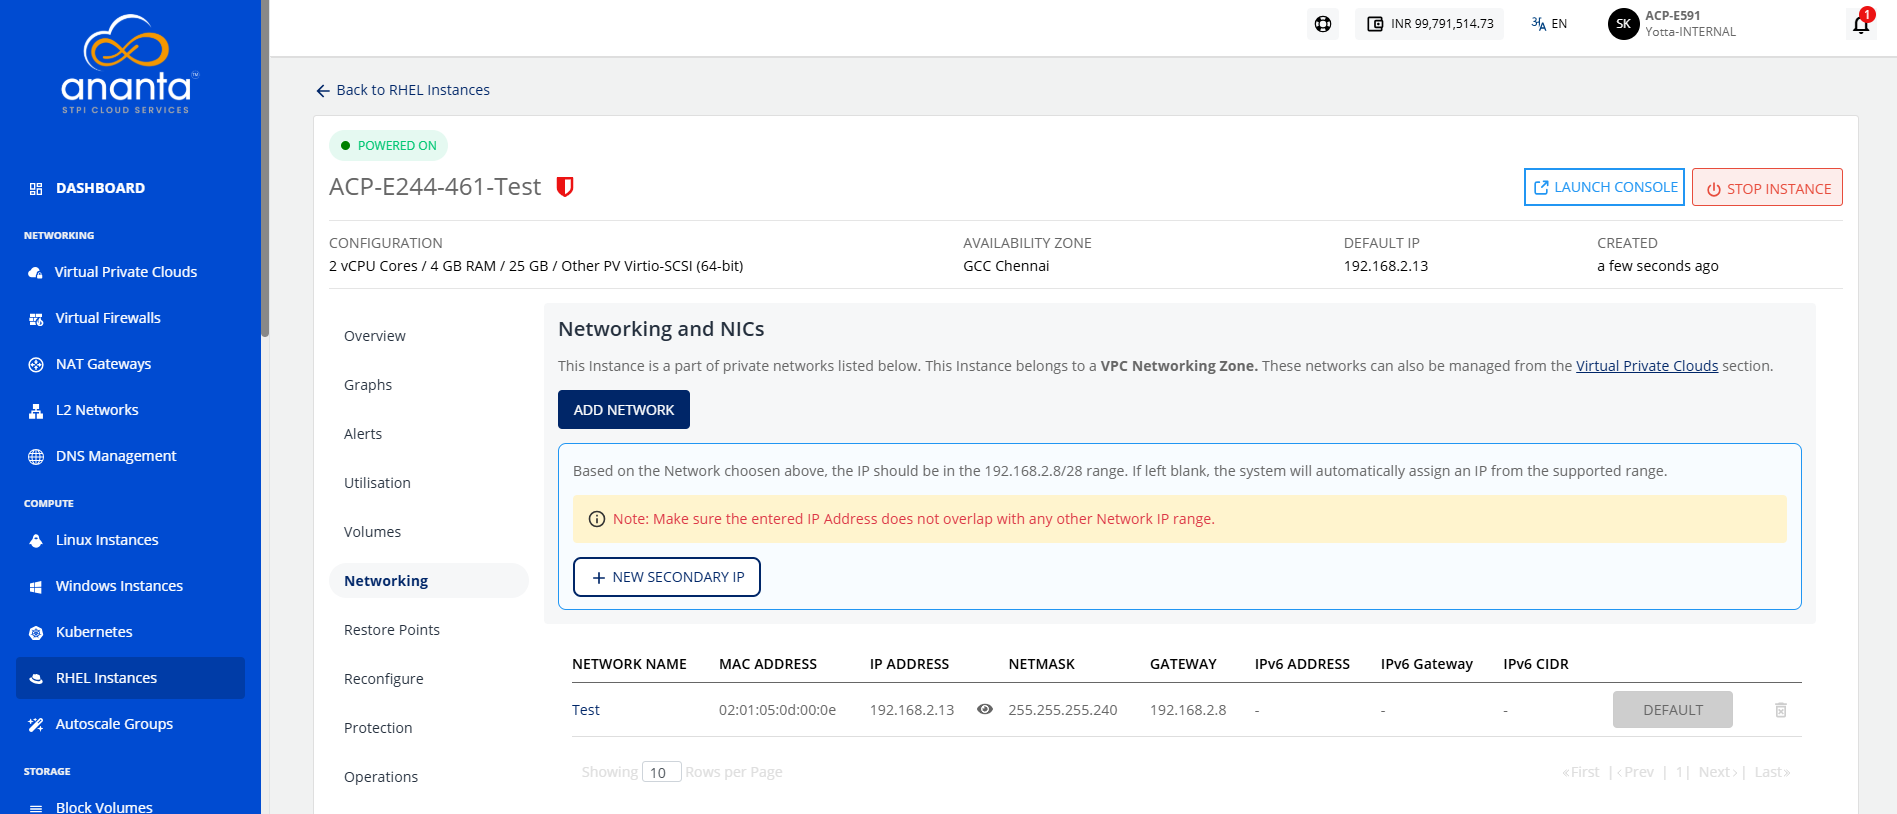
To view the Networks associated with a RHEL Instance, navigate to Compute > RHEL Instances and access the Networking tab. The Networking tab lists all the networks that a RHEL Instance is attached to, with the following details:
- Network Name
- MAC Address
- IP Address
- Netmask
- IPv6 Address
- IPv6 Gateway
- IPv6 CIDR
Adding a Network
If the Instance is inside a VPC, you can associate the Instance with multiple tiers within the VPC or share the Instance with other VPC networks in the same availability zone by using the Add Network option.
To add a network, follow these steps:
- Click the Add Network button. The following screen appears:
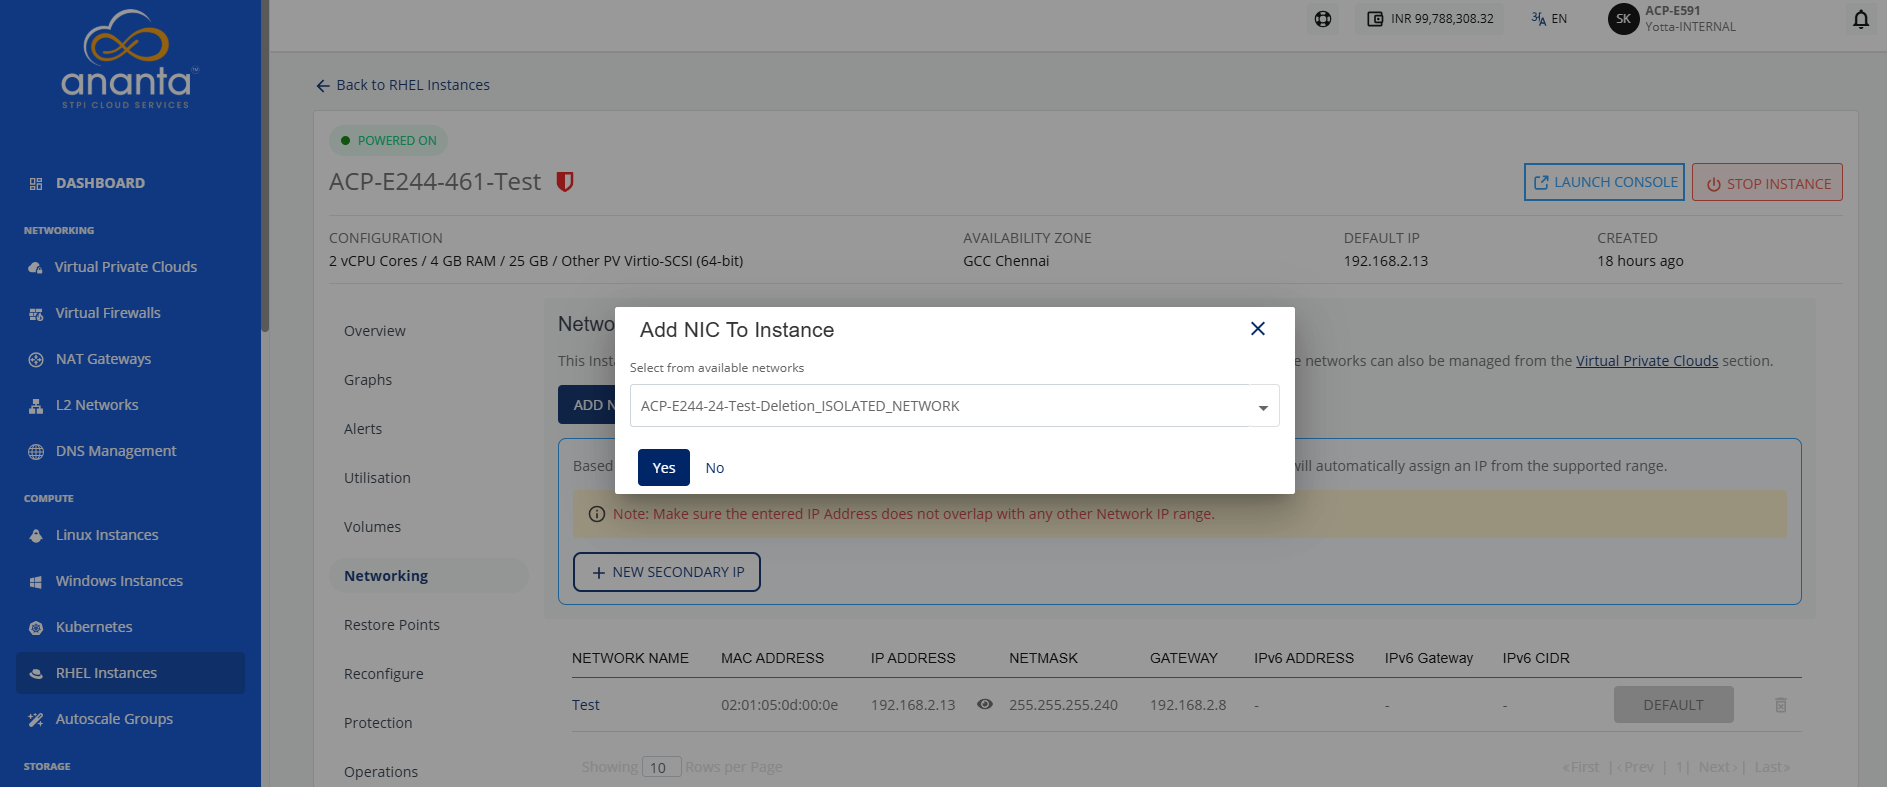
- Select the tier from the available networks.
note
The dropdown displays all tiers available in the instance's availability zone.
- Click Yes.
The Unlink action removes the network/tier association.
The Virtual Private Clouds service is used for advanced networking configurations.
Adding a Secondary IP
A Secondary IP Address is an additional IP address assigned to the same network interface as the primary IP address. It allows a single server or virtual machine to use multiple IP addresses without adding extra network interfaces.
Use cases
- Hosting multiple applications or websites on the same server.
- Running different services (such as web, API, FTP, or mail) using separate IP addresses.
- Supporting load balancing, firewall/NAT configurations, and network segmentation.
- Enabling high availability, failover, and application migration with minimal downtime.
- Providing unique IP addresses for containers, databases, and cloud workloads.
It is used in the following networking services in the NGC portal:
- Static NAT: You can map a public IP to a secondary IP for external access.
- Port Forwarding: You can direct traffic on specific ports to a secondary IP address assigned to the instance.
- Load Balancing: You can use secondary IPs as backend or virtual service IPs to distribute traffic.
To add a secondary IP, follow these steps:
- Navigate to Compute > RHEL Instances.
- Click the VPC name and select the Networking tab. The following screen appears:
- Click the New Secondary IP button. The following screen appears:
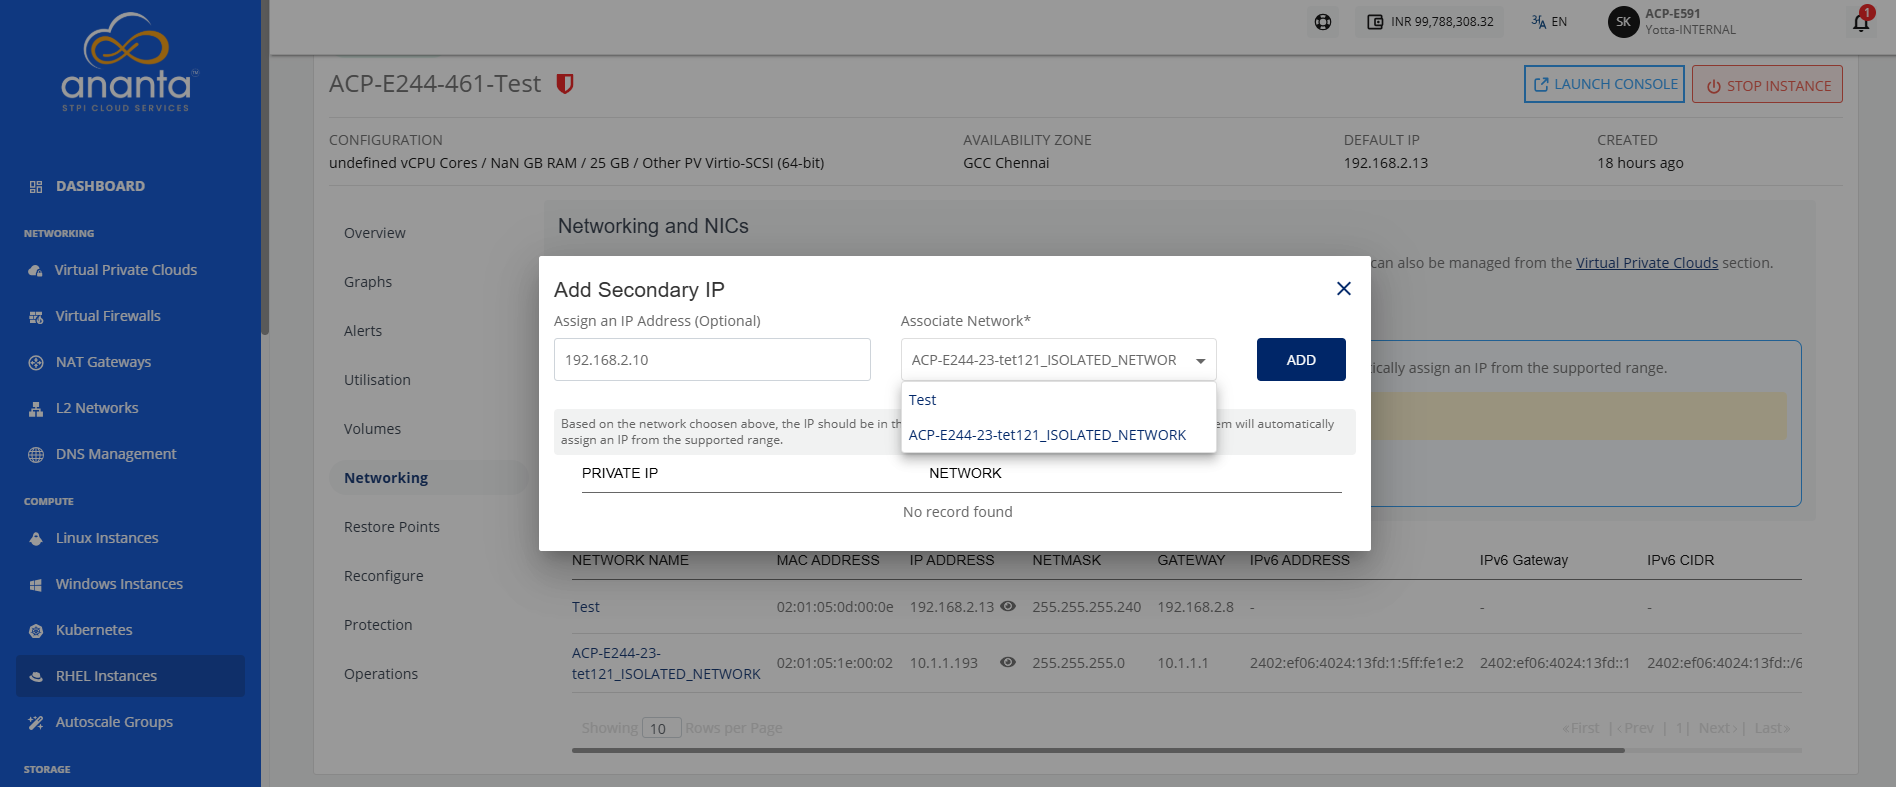
- Enter a new secondary IP address and select the associated network from the select tier dropdown.
- Click the Add button.
The Secondary IP is successfully added.