Creating Windows Instances
Before creating a Windows Instance, it is important to plan the architecture, networking and access to the Windows Instances. As a thumb rule:
- You can use a Windows Instance to get started quickly and set up your Linux Instances behind Ananta-powered cloud’s global server load balancer (GSLB) and control access by setting up virtual firewall rules; or;
- You can use a ‘tiered’ network (or Advanced VPC, virtual private cloud) Windows Instances to configure advanced networking and application architectures and control access by setting up access control lists.
Creating a Windows Instance
To create a Windows instance, follow these steps:
- Navigate to Compute > Windows Instances. The following screen appears:

- Click the New Windows Instance button. The following screen appears:

- Choose an Availability Zone, which is the geographical region where your Instance will be deployed. The chosen option should be the advanced VPC from all available AZs.
- Select a VPC network from the Select Network Dropdown and select the appropriate tier listed in Select a Network Tier.
note
To add a Windows Instance to a VPC, you need to have a VPC configured with at least one tier.
- Choose an OS Image to run on your Instance. You can also select the image from the My Images tab.
note
To learn how to upload a custom instance image, refer to the Uploading Custom Image page.
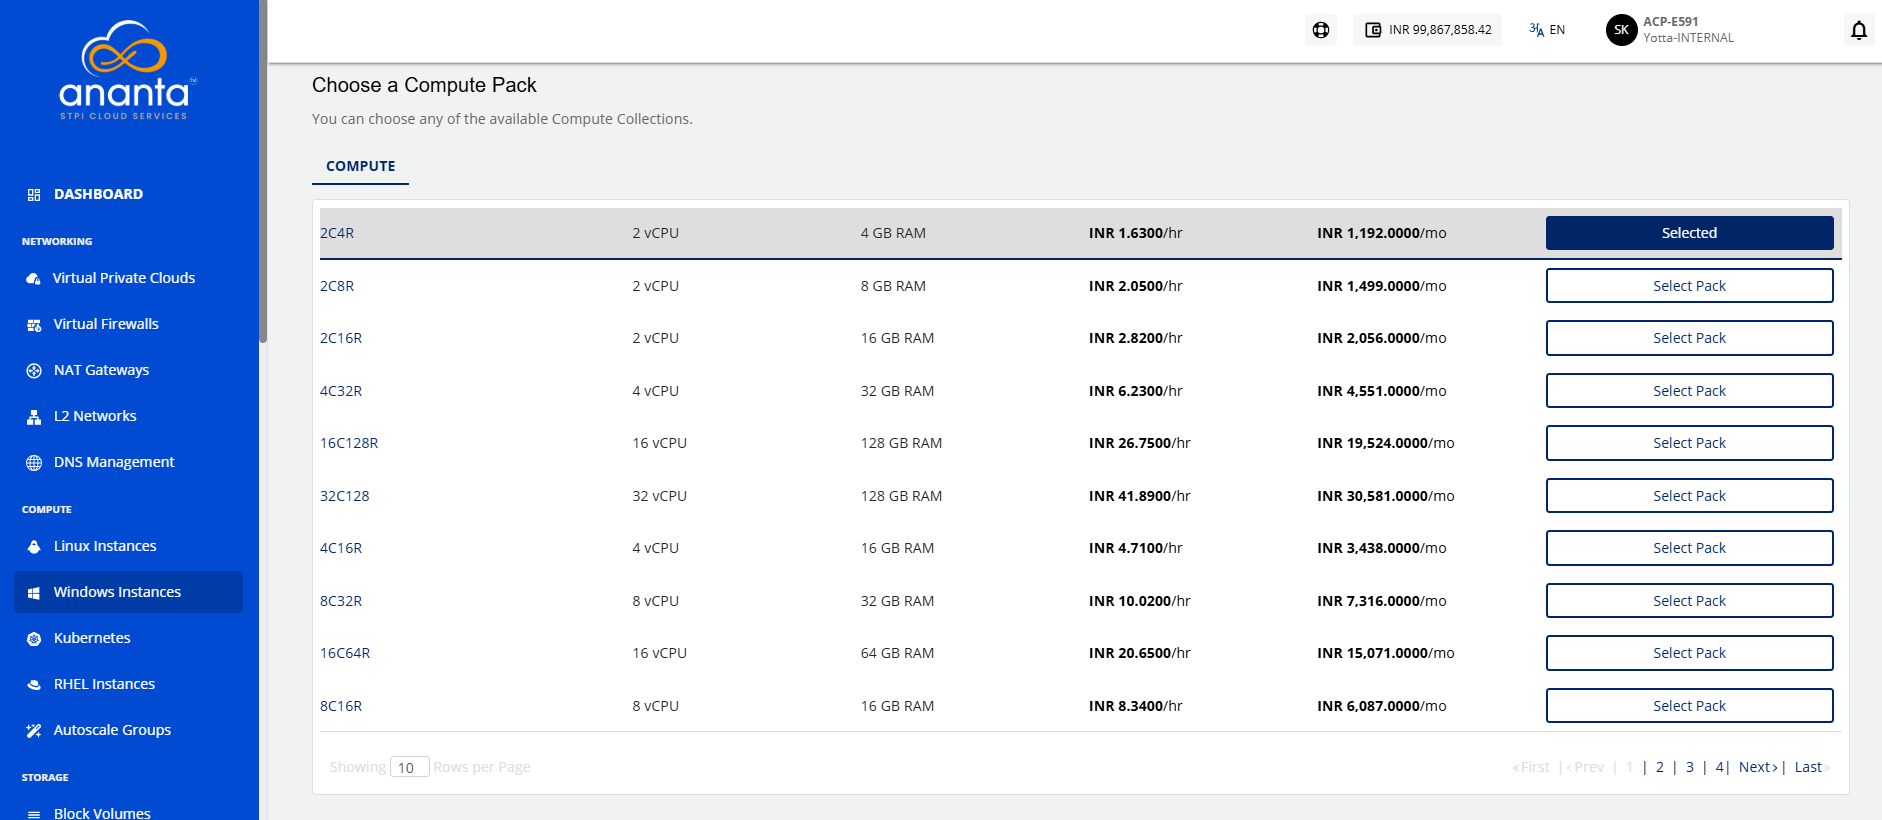
- Choose a compute pack from the available compute collections.
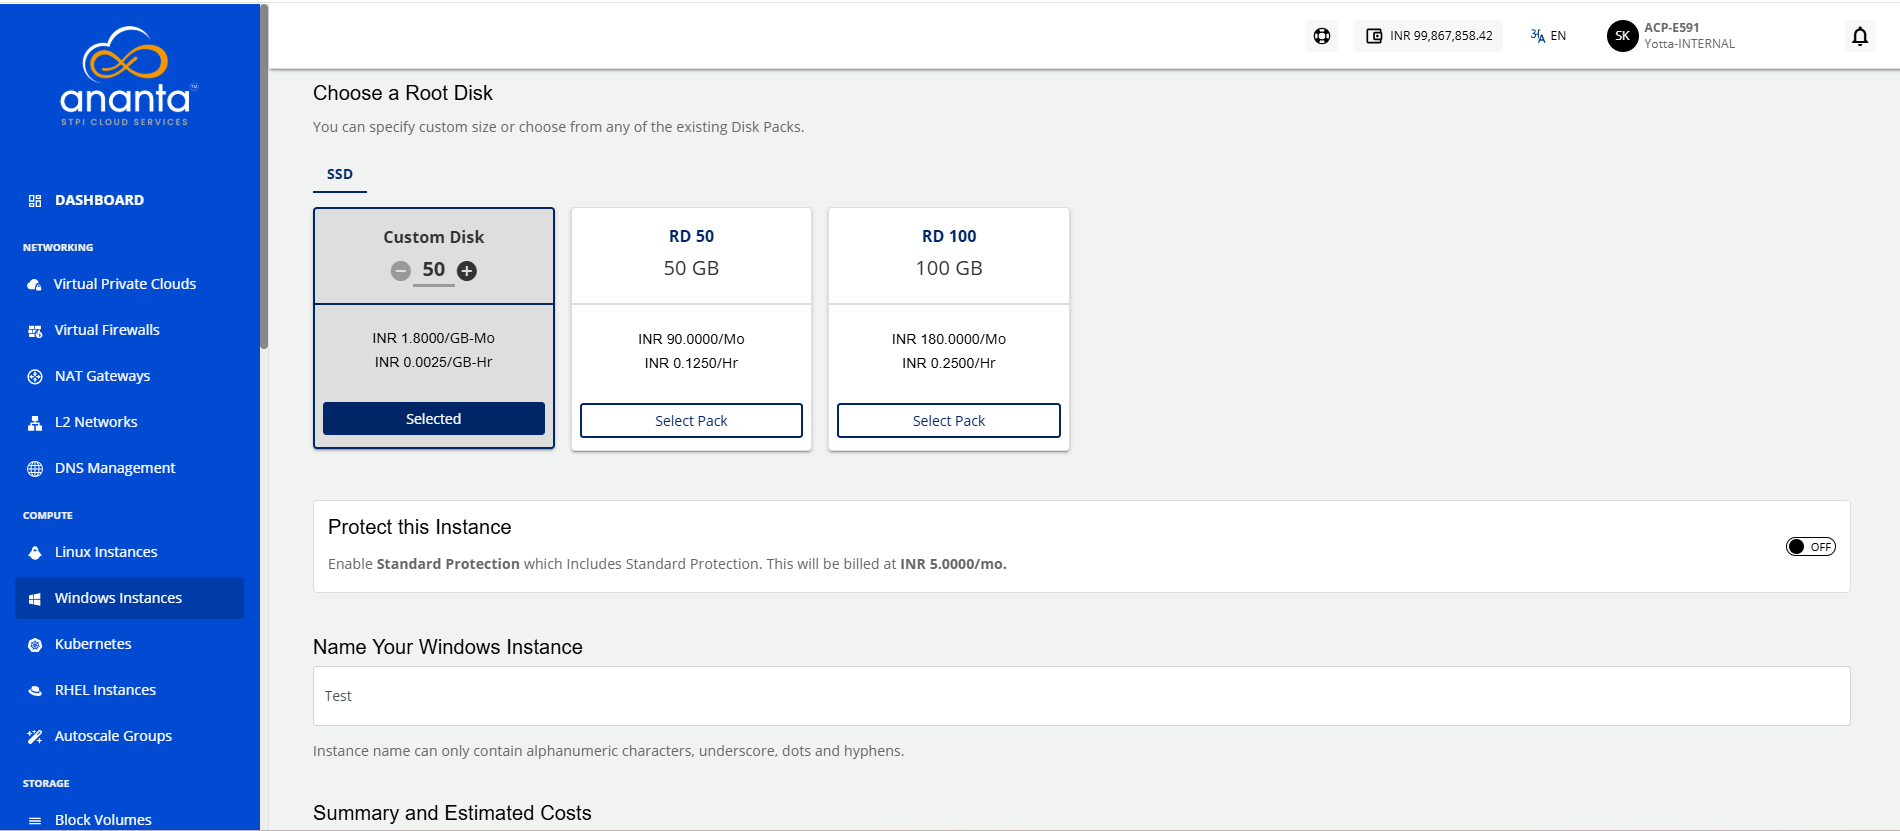
- Choose a Root disk from the available Disk packs, or you can use the free size option to specify the Root Disk.
note
The NGC offers both encrypted and non-encrypted offerings. To learn more about it, refer Disk Offerings.
- Select the option to Protect this Instance.
- In the Name Your Windows Instance field, enter the desired name for your Windows Instance. The Instance name must only contain alphanumeric characters, underscore, dots and hyphens.
- Under the Summary and Estimated Costs section, verify the estimated cost of your Windows Instance based on the chosen specifications.
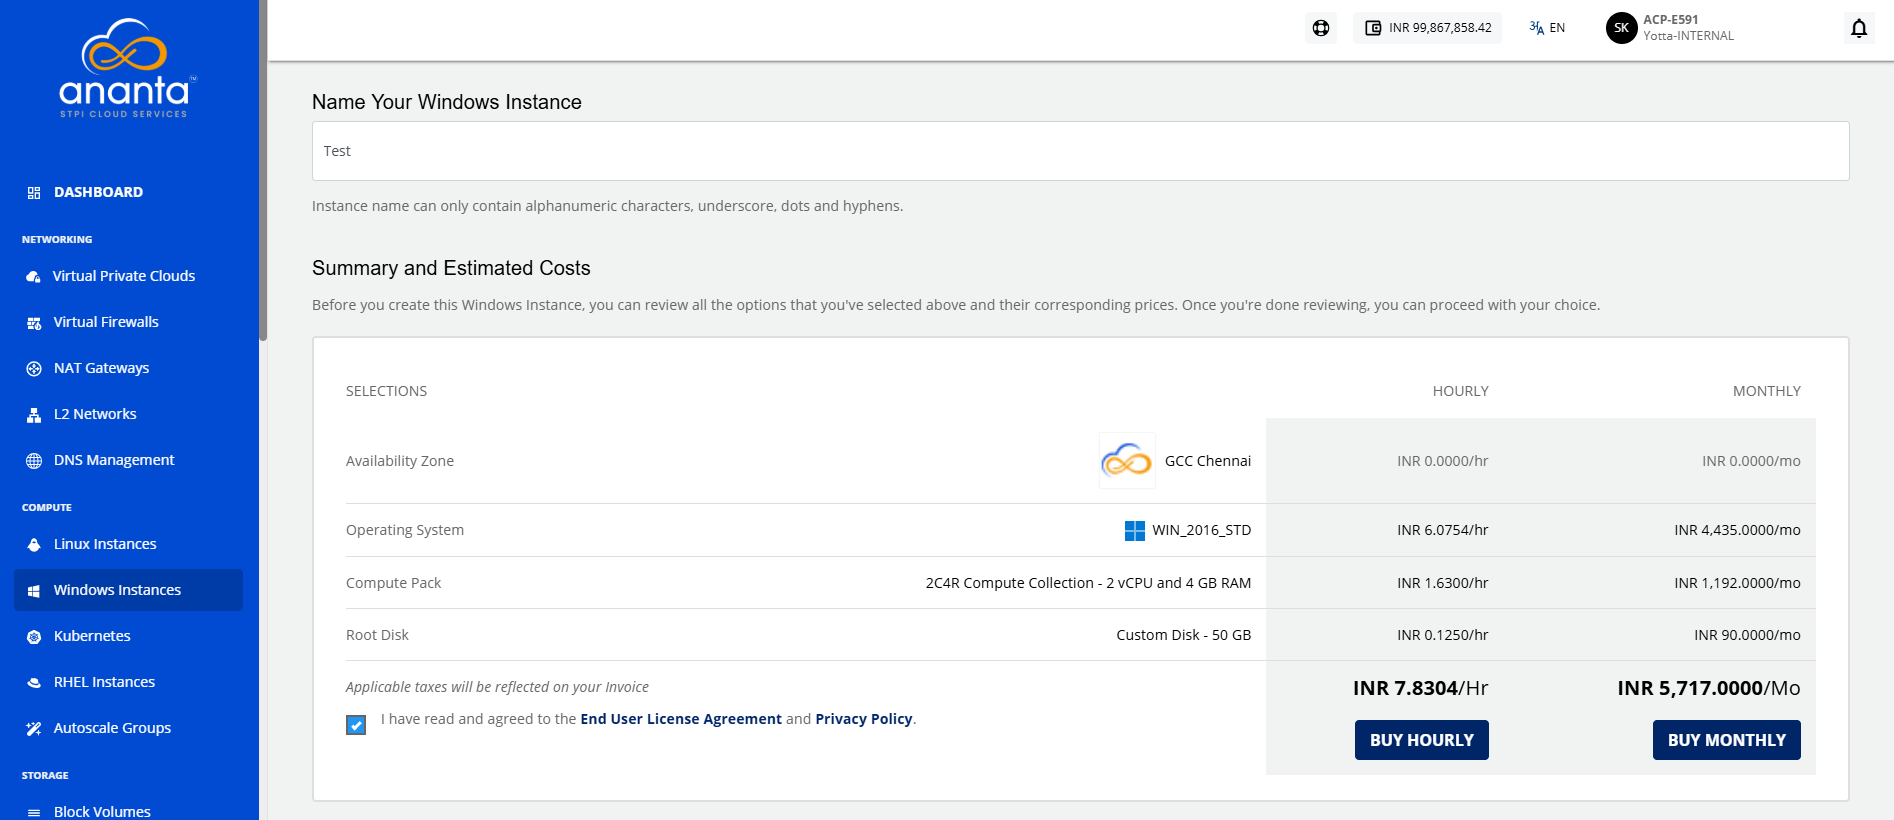
- After reviewing the policies mentioned by your cloud service provider, click the I have read and agreed to the End User License Agreement and Privacy Policy option.
- To view the price summary and any discount codes in your account, click the Buy Hourly or Buy Monthly button.
- You can apply any of the discount codes listed by clicking on the Apply button.
- You can also remove the applied discount code by clicking the Remove button.
- Clicking on the Cancel button, this action will be canceled.
- Click the Confirm button to create the Windows Instance.
This might take up to 5-8 minutes. You may use the Cloud Console during this time, but it is advised that you do not refresh the browser window.
Once ready, you receive a notification of this purchase at your email address. To access the newly created Windows instance, navigate to Compute > Windows Instances on the main navigation panel.